


DSLR Astrophotography 101: Exposure
Welcome to the second installment of our DSLR Astrophotography 101 series! If you missed the first one or need a refresher on the basics, here is the Introductory course.
For this blog, we’re doing a deep dive into the intricacies of exposure settings. We will cover the methods to expose for maximum data, the interconnections between focal length, pixel size, and exposure times.
This course getsreal technical, so we broke it down for you here.
Quick Summary:
- Push your histogram as far to the right as possible without overexposing and losing data to the edge. This allows us to acquire the most data possible in our images.
- You can calculate exposure times for pinpoint using the 500 Rulefor ballpark range, or the more precise NPF Rule. Both assume you use a tripod.
- 500 Rule: $$exposure \space time \approx \frac$$
- NPF Rule: $$exposure \space time \approx \frac{(35 \times f/stop)\div (30 \times pixel \space pitch) }$$
- Use the PhotoPills app to calculate the formulas for you.
- Once you have the exposure time, adjust your ISO to get the brightest possible image without overexposing the highlights in the histogram.
- A camera tracker is required for longer exposures at lower ISO
- This reduces noise and guarantees pinpoint stars when aligned properly
First off, let’s get these out of the way.
ASSUMPTIONS
We are assuming you’ve already got a DSLR and a lens or two since progressing in any course requires the proper materials.
We’re sure that camera has manual controls to adjust the aperture, shutter speeds, and ISO, and that you know how to use these settings to some degree. If you’re still a little shaky on these concepts then don’t fret, the internet has plenty ofresourcesto help out. Or if you just want a little refresher, we recommend checking out this article by theF-Stoppers. They’re great.
We also have to assume you’re using a tripod and know how to frame the images you want.
Now, this isn’trequired, but it’s helpful if you can do some math for what’s to come--nothing crazy, but your life will be easier.
Anyways, let’s get started!
Exposing to the Right
Full disclosure: it’s about to get nerdy...
Most DSLRs shoot either 12 or 14 bits of information. So if your camera records 12 bits of information, each pixel can record between 0 and 4,096 values where 0 is no information recorded and 4096 is recorded as absolute white. If you have a camera that records in 14 bits, it works similarly only now the range is between 0 to 16384, where 16384 is absolute white. Now whether your camera shoots 12 bits or 14 bits, all the information that a camera records can be broken up into seven--but not equal--segments. These are bright tones, light tones, lighter midtones, darker midtones, dark tones, and darkest tones.
One might assume the maximum tonal value of 4096 is equally divided amongst the stops of their 12-bit camera, but half of all the data (2048 values) is recorded in the brightest segment! Each segment beyond the first captures half as much data as the last, with stop progression being 2048 → 1024 → 512 → 256 → 128 → 64 → 32. The diagram below illustrates this concept.
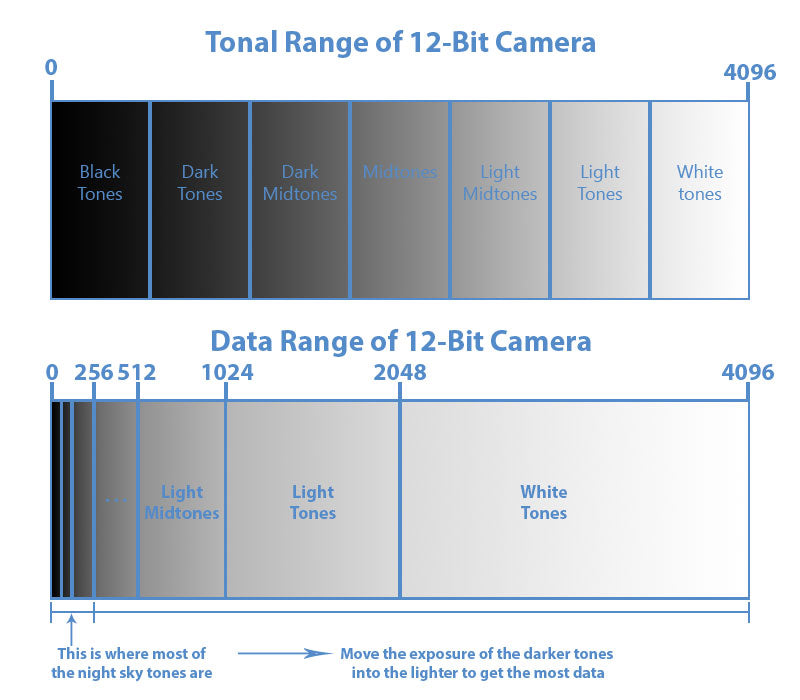
A quick look at this progression reveals a shocker to some:86% of the information in our images is held in brightest areas. That alone should be enough to push us towards ETTR. This is particularly important when it comes to astrophotography because we always want to capture for maximum data then process the data for aesthetics. The more data you have, the more room you have to process without creating artifacts. With how faint the celestial bodies are, the closer we can bring our inherently dark details to the mid-tones--or preferably on the brighter end, the better off we’ll be.
The Earth's Rotation and Astrophotography
We can illustrate the challenge of astrophotography using a Lazy Susan in a dark room. Strange name for a revolving tray, but no matter. Imagine you’re sitting on this slow-moving tray in the darkness and you’re surrounded by wall paintings. You can’t get off the tray and you can’t ask Susan to stop. She’s too lazy to listen. So how do we take a picture in this scenario?
A fast lens will help, but we need to find a Goldilocks set of conditions to get an optimum exposure time. If the exposure is too long the image will streak and we can’t have it too short or we’ll lose data to the darkness. Sure, we can crank up the ISO and sometimes that’s necessary, but if we go too high the image will be smothered in noise. If we leave the ISO too low then we’re in the same predicament we started with. A huge part of astrophotography is balancing these settings.
While we’re surrounded by the darkness of night and spinning atop our massive Lazy Susan (the Earth), we do our best to capture the painted sky of stars all around us. To that end, finding the right exposure time will allow the rest to fall into place.
Focal Length, Pixel Size, and Exposure Time
The longer the focal length of your lens and the smaller the pixels of your sensor, the shorter your shutter speed needs to be. This is so because an increase in focal length increases the magnification of incoming light to our camera. Conversely, a shorter focal length means we can take a longer exposure. This concept is fairly simple in that when we magnify an image, we similarly magnify the motion blur. If we’re using a long focal length and lengthy shutter speed, our image is going to blur like a fight scene from the Jason Bourne movies.
The old days of film photography brought us a formula for exposure, though outdated, that somewhat works with our modern practices and camera designs. The formula is500 divided by focal length ≈ longest exposure time in seconds w/o streaking stars (500/(focal length) ≈ exp. in seconds). This is called the500 Rule. The problem is modern camera sensors out-resolve film quality, with sensor pixels now smaller than even the best film stock grains. The 500 Rule does not account for the resolution of the sensor and will not be that accurate. But this ruledoes have a couple benefits in that it’s extremely basic and easy to remember and, while not totally accurate, it’ll show the ballpark of shutter speeds to experiment with.
Demonstrating the 500 Rule using a 24 mm focal length, here are the results for exposure time when shooting for refined stars:
$$20 \space seconds \approx \frac$$
While it’s great to at least be in the ballpark, we prefer to be as close as we can to home plate. That’s where theNPF Rule comes into play. This is the current and most accurate iteration of the exposure formula and is ultimately more complex as a necessity. The NPF Rule is as follows:
$$exposure \space time \approx \frac{(35 \times f/stop)\div (30 \times pixel \space pitch) }$$
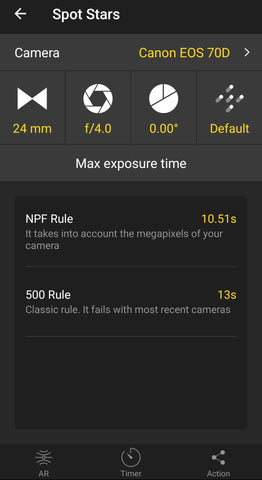
Using this formula, we’ll test using the same specs and goal as above for a Canon 70D. These are the results:
$$13 \space seconds \approx \frac{(35 \times f/4)\div (30 \times 4.09µ) }$$
That’s easy enough to plug in and calculate! We can rest easy knowing that a 13-second exposure will be an excellent place to start.
If you memorize this formula or just keep it in your camera bag, you’ll immediately know what exposure range to work with for those pinpoint stars. This will save you time and effort by already knowing what range to work with before heading out. To that end, there’s an even easier method which provides more utility, convenience, and accuracy.
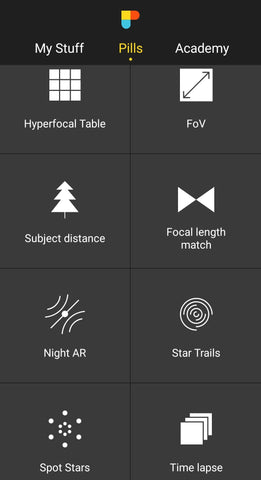
ThePhotoPills smartphone application automates this entire process and so much more. It’ll cost you the price of a cocktail ($10), but offers more than fleeting satisfaction. Utilizing the “Spot Stars” feature, we’re given the option to toggle between “Accurate Mode” for zero star trails, or “Standard Mode” for barely noticeable trails. We recommend the Standard mode if you’re going to downsize your images and show them on the internet. If you intend to make large prints, the Accurate Mode will serve you best.
This is a resource our team and other prominent photographers employ to optimize our nightly photoshoots, and we’d be remiss if we didn’t bring it up. The PhotoPillsapp has a built-in NPF formula, depth of field calculator, photo planner, augmented reality simulator, and so much more for the avid photographer to make use of. Our good friendTravis Burke, who guest starred on ourpodcast, uses this app all the time. If you haven’t seen his work you really should check it out hisInstagram.
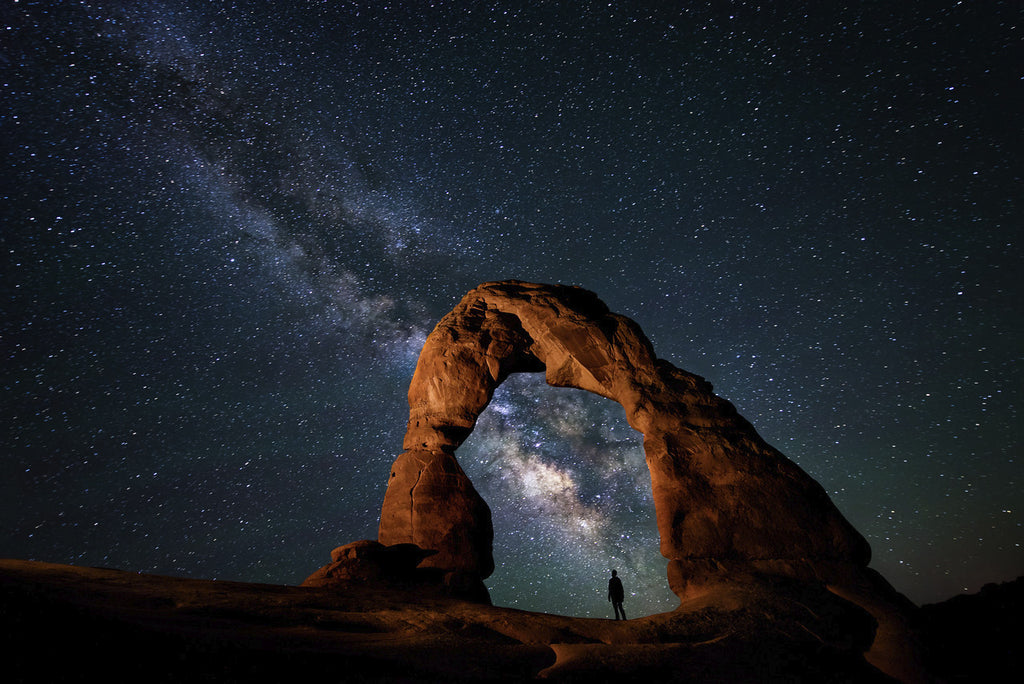
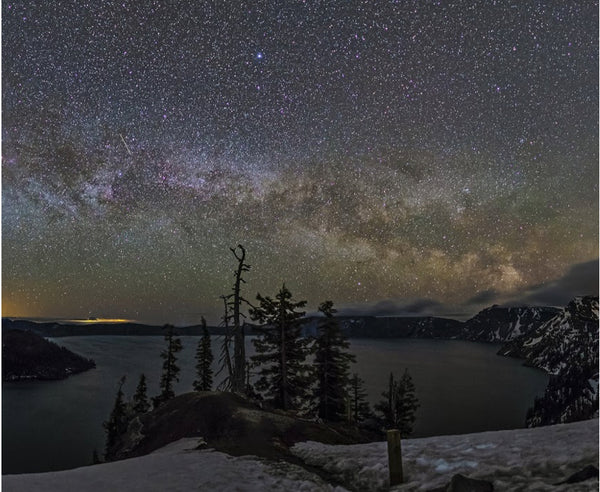
Image credit: Travis Burke
Exposure Time. Got It. And the ISO?
The next step is to maximize our ETTR technique through the ISO setting. Right here you might be thinking: “But the noise! Be careful of the noise!” We hear you. Nonetheless, we’ll need to crank it up enough to get the darkest portions of our histogram as far to the right as possible without sacrificing any data to the edge.
Your concerns of noise are valid, and you’re at even more of a disadvantage when using a longer focal length lens. The reduce exposure from a long lens, coupled with increased ISO does not make your images look better. You need the reduced exposure time or you’re guaranteed extensive motion blur, but this is unavoidable because of this danged Lazy Susan we’re forever fixed upon. For those shooting with just a tripod and DSLR, the more apparent our limitations become.
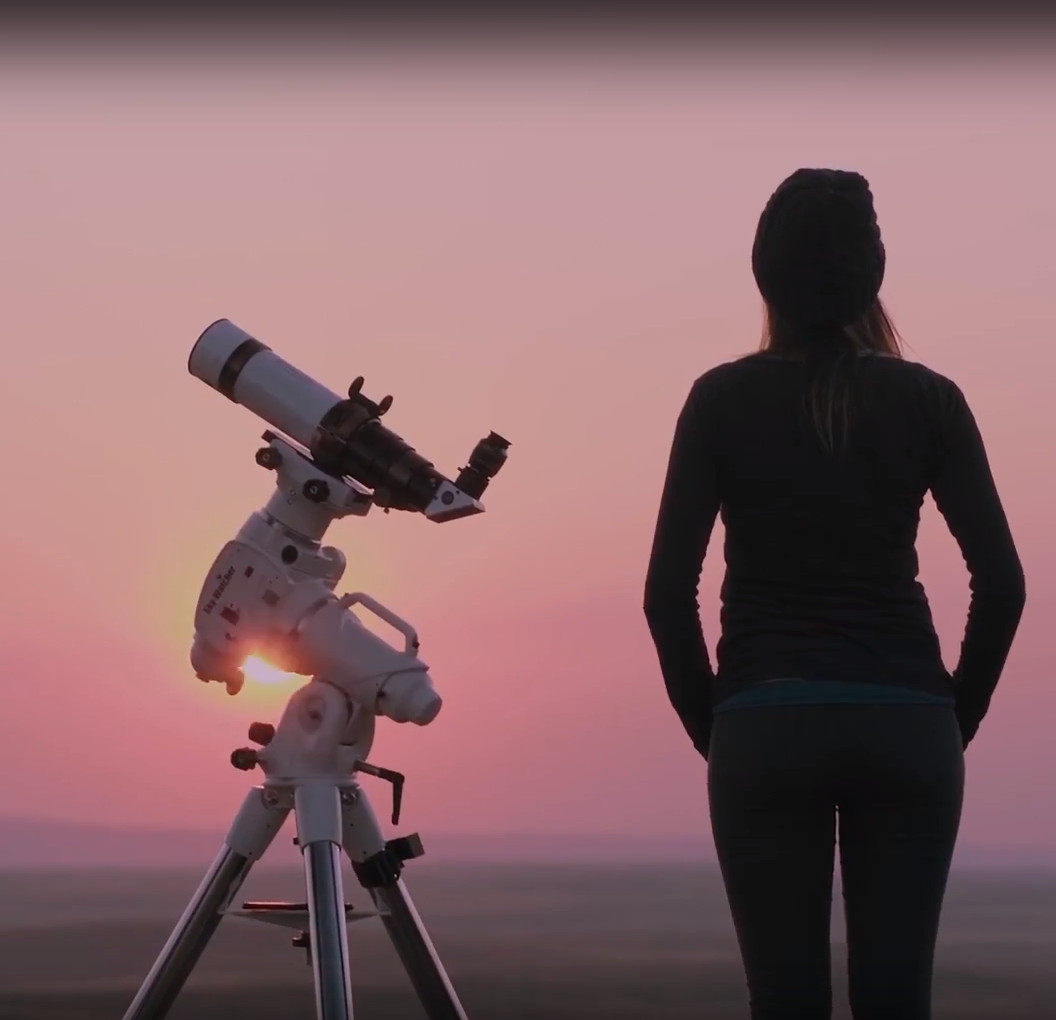
Long Exposures and Tracking
Imagine we’re back on the Lazy Susan--who still hasn’t gotten a job--but this time we’ve got a device fixed on the central axis of rotation. This device rotates the camera in a direction opposite the way we’re spinning with Susan and at the same rate. This device allows us to aim our camera at any painting in the room and stay there. Our rotation is counteracted by this device known as a camera tracker. When aligned to the celestial pole, the tracker rotates the camera opposite to the Earth's rotation and allows us to track the stars across the night sky.
If you plan to use a longer focal length lens, or if you wish to lower the camera’s ISO and take a longer exposure to reduce noise, a tracker is required. Long exposure astrophotography is essentially impossible without a tracker unless you want blurs and streaks. Also, camera trackers are needed if you want to start stacking images and further reduce the noise (which we’ll be covering in detail in our next blog).
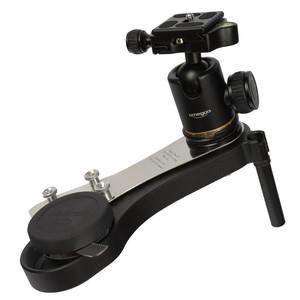
We’ve got plenty of options for star trackers like theOmegon Mini Track Mount to get you started off right. It’s fully mechanical and requires no batteries or external power supply, tracking for about an hour before needing to be rewound. Its design is so simple we can be tracking within minutes of bringing it out. This is an ideal product for the avid camper or general hiker photographer as it is also small and lightweight.
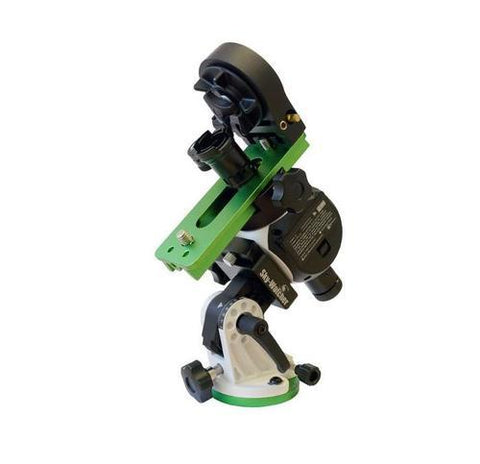
A step up would be something like theStar Adventurer Mini. This can track as long as the AA batteries hold and with more accuracy. There’s a bit of a learning curve with this tracker, but once understood you’ll be well equipped for any future photoshoot. It has a few bonus features we really like. This tracker can be connected to your camera to be used as an intervalometer. Additionally, a counterweight bar can be added to level out the tracker when using a longer, heavier lens.
No matter which tracker you may choose, you’re going to get an excellent product. If you want to see more, click on the hyperlink to browse other options.
That's All, Folks!
We reach the closure for this course on exposure.
Next up we’re plunging into the depths of processing software and photo editing to make our images pristine and pretty for all to see.
Hopefully, you’ve gotten some helpful pointers from this post and are more confident pushing your camera’s limits. Be sure to share your photos with us onInstagram! We’d love to see your work and you can enter our monthly photo contest for a free OPT gift card!
Until then, stay safe and keep looking up.

Image credit: Travis Burke
ETTR still a cloud of confusion for you? Leave us a comment and we’ll help to clear it up.