


Milky Way Photography - How to image the Milky Way Galaxy
Have you ever seen photo of the Milky Way and been struck speechless? Do you dream to capture in-depth Milky Way Galaxy photos but aren’t sure quite where to start? We at OPT Corp are laying down the steps for you and making it easier than ever. Read on to learn all about Milky Way photography!

This gif was captured by Sarah Longcor (@astro.sez)
Why choose Milky Way Photography?
Milky Way photography is popular, because you don’t always need a telescope to capture these images. Its entirely possible to image the Milky Way with only a camera and a decent star tracker! Although some stacking and editing may be necessary, anyone can do it, just follow the steps listed below.
- Use an aperture of f/2.8 (or the widest in your lens)
- Set an ISO between 3200 and 6400
- Adjust the shutter speed to be between 10-25 secs
- Set your white balance to 4000k
- Focus manually on a star or a distant light
- Adjust the general camera settings for the Milky Way
- Use a shutter delay (at least 2 seconds)
- Check your shot histogram
How to Capture the Milky Way Galaxy
To produce an extraordinary Milky Way image with your DSLR camera, multiple, long exposure shots must be captured. These shots should be imaged with a moderately high ISO setting, combined with the maximum possible aperture of your camera lenses. Doing this will ensure the clarity, structure and colors of the galaxy are properly shown in your image.
ISO is your camera’s sensitivity to light as it pertains to your sensor. Using a higher ISO setting increases your camera’s sensitivity to light. In combination with a high aperture allows for the absolute maximum amount of light to be captured with your camera in a short frame of time.
To start, try imaging 30-second exposure frames at a time, with an ISO setting of 1600, and an f-stop of f/2.8. If you wish for your image to be stronger, you can try stacking images with reduced noise and a strong signal.
To create an excellent Milky Way Galaxy image, you will need the following:
- A tracking camera mount (star tracker)
- A “fast” camera lens
- A long exposure image to collect the maximum amount of light in a single frame.
- Image stacking skills/abilities.
What do you need for Milky Way Photography?
Our recommended star tracker for galaxy imaging is the Sky Watcher Star Adventurer 2i Pro Pack. The Star Adventurer assists with long exposures and is perfect for shooting deeper galaxy details, without producing star trails. In addition to your star tracker, a decent camera is a must. You can use a DSLR camera, or you can look into one of our dedicated astronomy cameras.
There are a few main variables to keep in mind when considering Milky Way Galaxy imaging. First, you need to consider the type of lens you are using. And for this type of imaging, you will need a wide field camera lens.
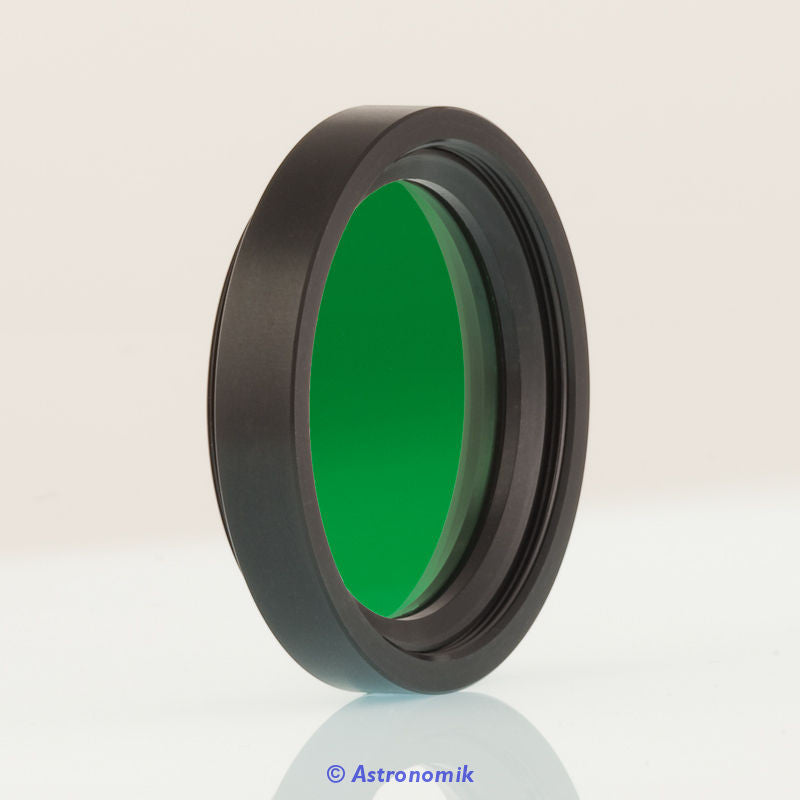
Second, you should consider purchasing a camera lens filter. Depending on where you are, we suggest investing in a decent light pollution filter. Our recommendation would be the Universal Astro Clip-in Light Pollution Filter. This will dim any outside, unwanted light that may be coming from outside sources.
Next, you want to decide on the details in the foreground of your image. Are you looking to create an image with a solid object(s) in the foreground? Or do you just want to capture the night sky? Having a solid, unmoving object in your shot give your image perspective that is difficult to get in other astrophotography images.
How can you make your image special?
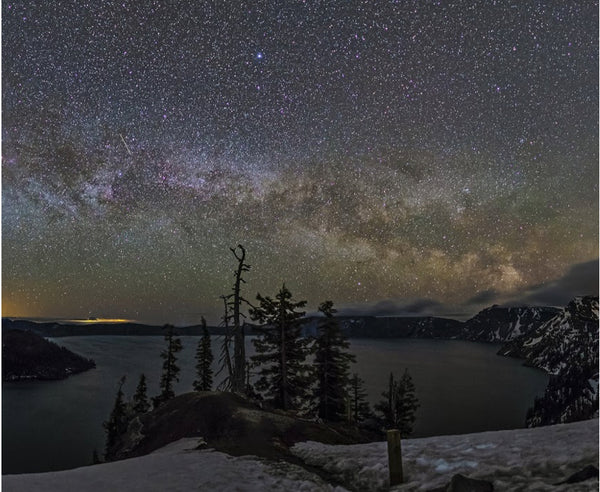
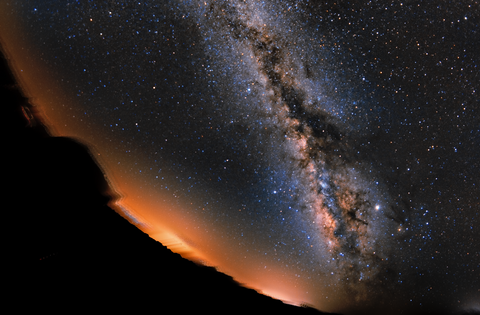
Unlike the numerous other galaxies targets you may image, or aspire to capture in the future, the Milky Way Galaxy is OUR galaxy. It is what you see when you look up. We live in it. Take this opportunity to show that we are present in this galaxy in you image. Take, for example, the image below by OPT’s own Kurt Kimbrell (@gorilla_astro).
This makes choosing your imaging location an extremely important step. Of course, you will want to find a place with dark skies, to minimize and light pollution or interference. But you may also want to consider the landscape of the location you are imaging in. Are there street lights around? Will there be mountains in the background, and do you want them there? Check out this dark sky finder to find a suitable location. Or, you can go to your nearest national or state park, as they tend to have minimal light pollution.
Keep in mind that there may also be lunar interference, so be sure to be mindful of where you are in the moon cycle before heading out to image. You will want to be as close to the new moon as possible.
Another factor you will want to keep in mind is which part of the galaxy you want to image? From March to November, the bright galactic center of the Milky Way will be visible. From October to April, you will be able to view the outer edge of the galaxy, alongside the constellation Orion. To aid you with picking the right night to image, we recommend checking out the SkyGuide app.
Keep in mind:
- You will want your ISO to be higher than usual. For moderate light pollution, use an ISO of 1600-3200. Carefully balance the noise and the light collected. You can always smooth out the balanced light and noise in the stacking process.
- Use the widest aperture possible. You want to do this in order to let in as much light as possible in the shortest amount of time. (For better star quality, you may have to stop down your camera lens if it is of f/2.8 or lower.)
- We recommend using a shutter release cable. Or at the very least, setting your camera’s drive mode to have a 10-second delay. This is to avoid any movement caused by pressing the shifter button. Any movement can result in unwanted blurriness in your photo or elongated stars. You will want to ensure your tripod head is properly locked and secured.
- Image in 30-second exposures. You want to maximize the light that you collect in each frame. Longer exposure periods may also result in star trails, but this will only be evident if zoomed into 100%. Again, you can always resolve this in the stacking process.
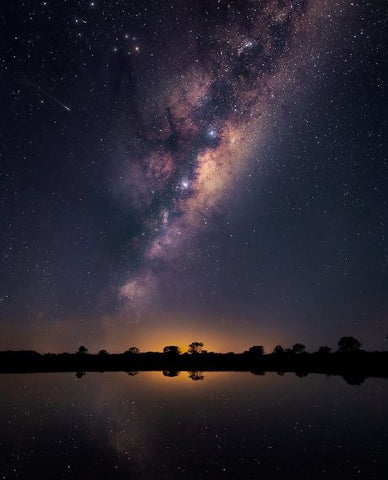
Image captured by Sarah Longcor (@astro.sez)
To have sharper stars in your image, try stopping down the f-ratio of your camera lens. This may sacrifice some of your ability to gather light, however that sacrifice is exchanged for smaller, clearer stars.
That just about sums up how to image the Milky Way Galaxy! Are there any tips that we missed that you found out on your own? What else would you like for us to breakdown for you? Let us know in the comments below. Be sure to comment your favorite Milky Way Galaxy shot for a chance to be featured on one of our Social platforms!
Check us out on social:
6 Responses
Jo lene
Alert : Mandeline Sterling is groomer for dogs ..Do not leave your pet with her alone. If your dog bites her know it’s not your dog but how she treats the dog when grooming .. facts: she has broken a dog leg for not 🚭 etenijg to her she has dump a liter of puppies for the same reason. M Sterling is not who she says she is ..
Randy sterling
I like to comment on Mandeline sterling post of false allegations. I like to apologize for her using this forum to bring attention to herself . Mandeline has a medical condition that she talk to people that are not there and other times she ok . This condition affects the brain and cognitive abilities. Again I apologize and hope it won’t happen again .
Mandeline Sterling
I am raising awareness about child abuse and domestic violence. Kurt Kimbrell is a convicted felon for brutally beating our 6yr old little boy who is extra small bc he’s a preemie.
I have an Instagram account where I am posting all documentation. He beat me up the same way in 2017.
James Buck
In the same regards for #3, I use an intervalometer for shutter release and exposure times.
Rick
“This is to avoid any movement caused by pressing the shitter button.” I don’t recall my camera having a “shitter button”. Keep in mind:, #3


Anonymous
October 10, 2024
Mandeline is a animal abuser but she calls herself animal groomer. I am bringing awareness to the good people that are looking for a groomer.. She even shows in one of her videos on YouTube that a dog didn’t like her and and bite her. She has also dumped puppies out in country . Her show dogs she kept pin up in their crates all day then let them out to potty and if one did something she didn’t like she would do something very harmful to the dog to were it would screech loudly in pain. She claims to love animals but if she did she wouldn’t keep getting rid of them when they do something on accident or for punishment when the pet is her child pet. Just think twice before leaving your pet with her to groom . seriously!