How to Use a Telescope for Beginners Guide
Welcome to the hobby! Using your telescope for the first time is an exciting first step into exploring the universe. This guide will walk you through all the parts of your telescope and provide tips to maximize your stargazing experience!
Before we get into the more technical parts of your telescope, let’s review the main pieces first. Check out this chart below that visually defines the pieces of a telescope for you.
Parts of a Telescope
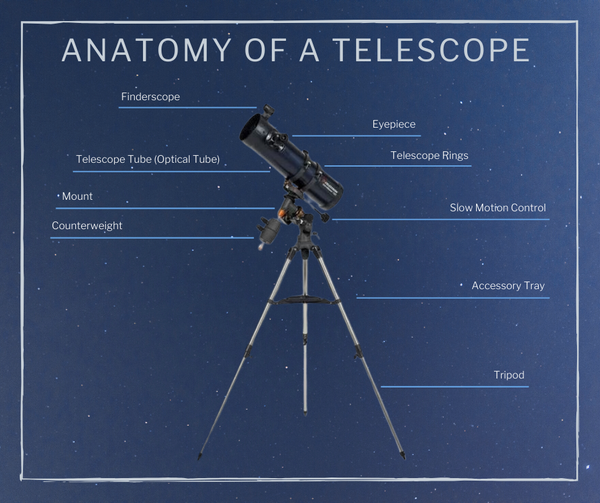
Each part of the telescope works together to function as a powerful observing system. There are three main types, refractor, reflector, and catadioptric. To learn more about the different types, and if you're wondering which one you have, check out our blog on the different types of telescopes!
The next thing you should get to know about your telescope is its accessories. There are many, many accessories and it can be easy to feel overwhelmed at first. We have a top 10 guide here to help you get started with making your selections.
One of the first accessory types you should get to know before using your telescope is your eyepieces. Let's take a look at what they do and how to use them next in this telescope for beginners guide.
What You Need to Know About Your Telescope's Eyepieces
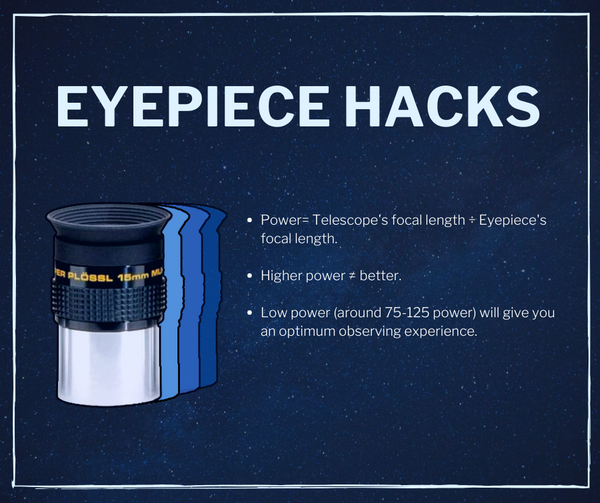
Eyepieces are defined in part by their focal length. Your eyepiece’s focal length is stamped somewhere on the eyepiece, usually in "mm." The focal length will tell you its magnification/power from a simple formula (the telescope's focal length divided by the eyepiece's focal length).
How to Use Telescope Eyepieces
- To use them, start with a low power eyepiece (large focal length number) to find your target.
- Look through the eyepiece.
- Find the best comfort and view for you. Tip: If you get too close, it can cause a black ring to appear around your view.
- Turn the focus knob to make the celestial object look clear in the eyepiece–first one way, then the other–until the celestial object is in focus.
- When you’re ready, switch eyepieces to a higher power and repeat the steps above. You can also remove the eyepiece, insert a Barlow (doubles the magnification of the eyepiece), reinsert the eyepiece, and repeat the steps above.
Finding the right eyepiece and getting in focus is only one step in the process. Many beginner telescope users forget that everything in space is in motion! Because everything in space is in motion, using a proper mount is important.
Why Your Telescope Mount Matters
To view a deep space celestial object, you must align with the motion of the object you want to see in relation to the motion of Earth.
Your mount, depending on the type you have, will help you track the celestial objects as it moves across the sky.
Almost all mounts are variations of two main categories: Altitude-Azimuth (Alt-Az) and equatorial. Both types of mounts can point the optical tube of your telescope around the sky, and both can function electronically to compensate for the Earth’s rotation.
How Does a Telescope Alt-Az Mount Work?
Let’s start with Alt-Az designs. The best example to visualize this style of telescope mount is the Dobsonian.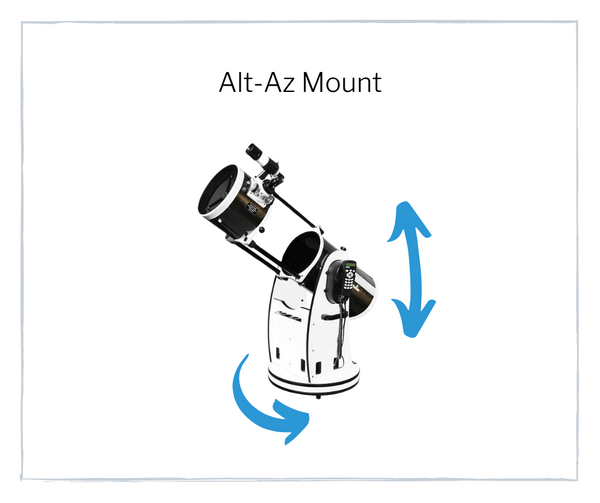
This telescope is a Newtonian reflector that sits on a cradle with a flat, lazy-susan-like table that rotates around a vertical axis. This axis points the telescope around the horizon a full 360 degrees in “azimuth.”
The second axis is mounted on the optical tube. It sits in the cradle, allowing the telescope tube to point up and down. This “altitude” axis can only point from 0 degrees (tube horizontal) to 90 degrees (straight up).
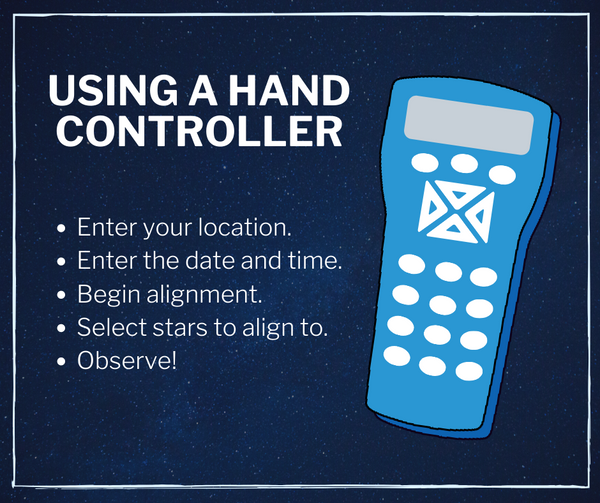
Alt-Az mounts are very easy to use, you rotate the telescope up and down and left and right to get the part of the sky you’re interested in seeing. If your telescope has GoTo capability, then push the buttons in the right direction or enter your object, and the telescope will slew the part of the sky for you.
In addition to Dobsonians (the most common Alt-Az telescope), most commercial manufacturers offer Alt-Az designs, like the Meade Star Navigator 125 or the Celestron NexStar line of scopes.
Alt-Az Mounts and Astrophotography
While Alt-Az mounts are ubiquitous and easy to use, they have one drawback, especially for astro-imagers looking to make long-exposure images. After a few minutes of tracking the sky, the field of view will rotate slightly as the Earth turns - even though the object you are looking at will still be centered in the eyepiece or camera frame. For short image exposures of less than a few minutes or using the scope visually through an eyepiece, this isn’t a problem. For exposures of longer than about 5 minutes, the stars start to make small circles in the image.
What is the Advantage of Telescope Equatorial Mounts?
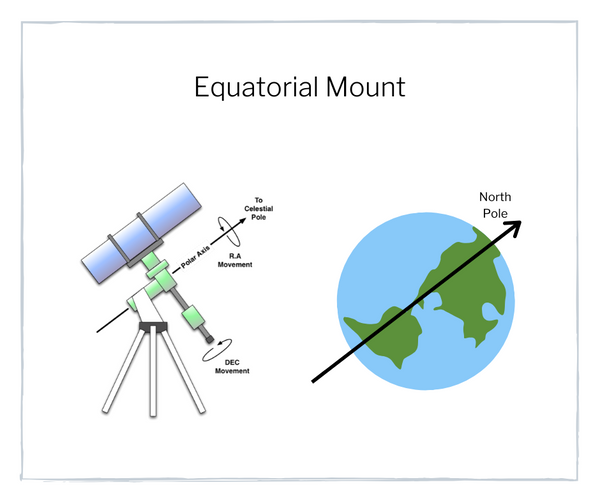
The advantage of equatorial mounts is that it eliminates field rotation and corrects for the rotation of the Earth via one axis only (Alt-Az mounts require that BOTH axis be driven continuously). The disadvantage is that your mount must be aligned with the rotation axis of the Earth (the North Star) to work correctly.
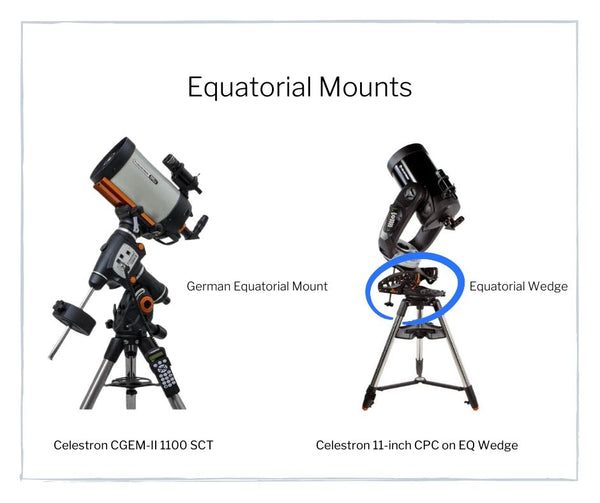
Examples of an equatorial mount include SCT’s that have an equatorial wedge to tilt the fork arms toward the North Pole and German equatorial mounts that come with many refractors.
As a pro tip, you can convert your Alt-Az mount to an equatorial mount. Start by tilting the lazy-susan table to an angle that matches your latitude, and direct the cradle to the North Pole. By tilting your Alt-Az mount, what was formerly your azimuth (left-right) axis transforms into a right-ascension axis (also called the polar axis). The former altitude (up-down) axis is now the declination axis.
Although the ways we have looked over so far are efficient, there is one handy tool you should know about, and that's the finderscope.
What is the Benefit of a Finderscope for Your Telescope?
The finderscope helps you find celestial objects in your optical tube. Most finderscopes come as either a red dot finderscope or an optical finderscope. Optical finderscopes usually have the same optical characteristics as a pair of binoculars, and they typically have about 10 power and an objective diameter of around 50-60 mm.
The finderscope provides you with a wide view of the sky and a closer view of the object you want to see. For beginners, it is easier to look through this low power telescope to find things, especially if you don’t have GoTo capability or a computerized mount.
When it’s your first night out with your scope, one of the first things you should do is take time to align the finderscope that came with it.
How to Align Your Finderscope
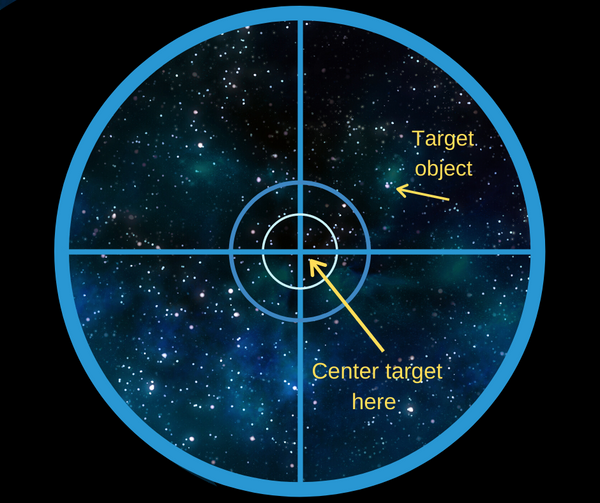
- Look anywhere in the sky and find a bright star, planet, or use the Moon, with your big telescope and turn on computerized mount if you have one. Use a 26 mm or so eyepiece.
- If you’re using a GoTo telescope, set it up, and point it at one of the above-listed objects (star, planet, or the Moon).
- Using the adjustment screws (varies with design but is usually three nylon screws holding the finder in its mount), move the finderscope till the bright object you’re looking at is in the center of the finderscope.
- Take time to get this as close as you can to the view in the eyepiece. It saves time when you’re trying to find something without computer help.
- You don’t need to do this often, and usually, once every few months is enough.
- Now that your telescope is aligned correctly and you have the right eyepiece, it’s time for observing! What will you observe first?
Need more help to get started? Check out our pro tips below!
Observation Telescope Tips and Tricks!
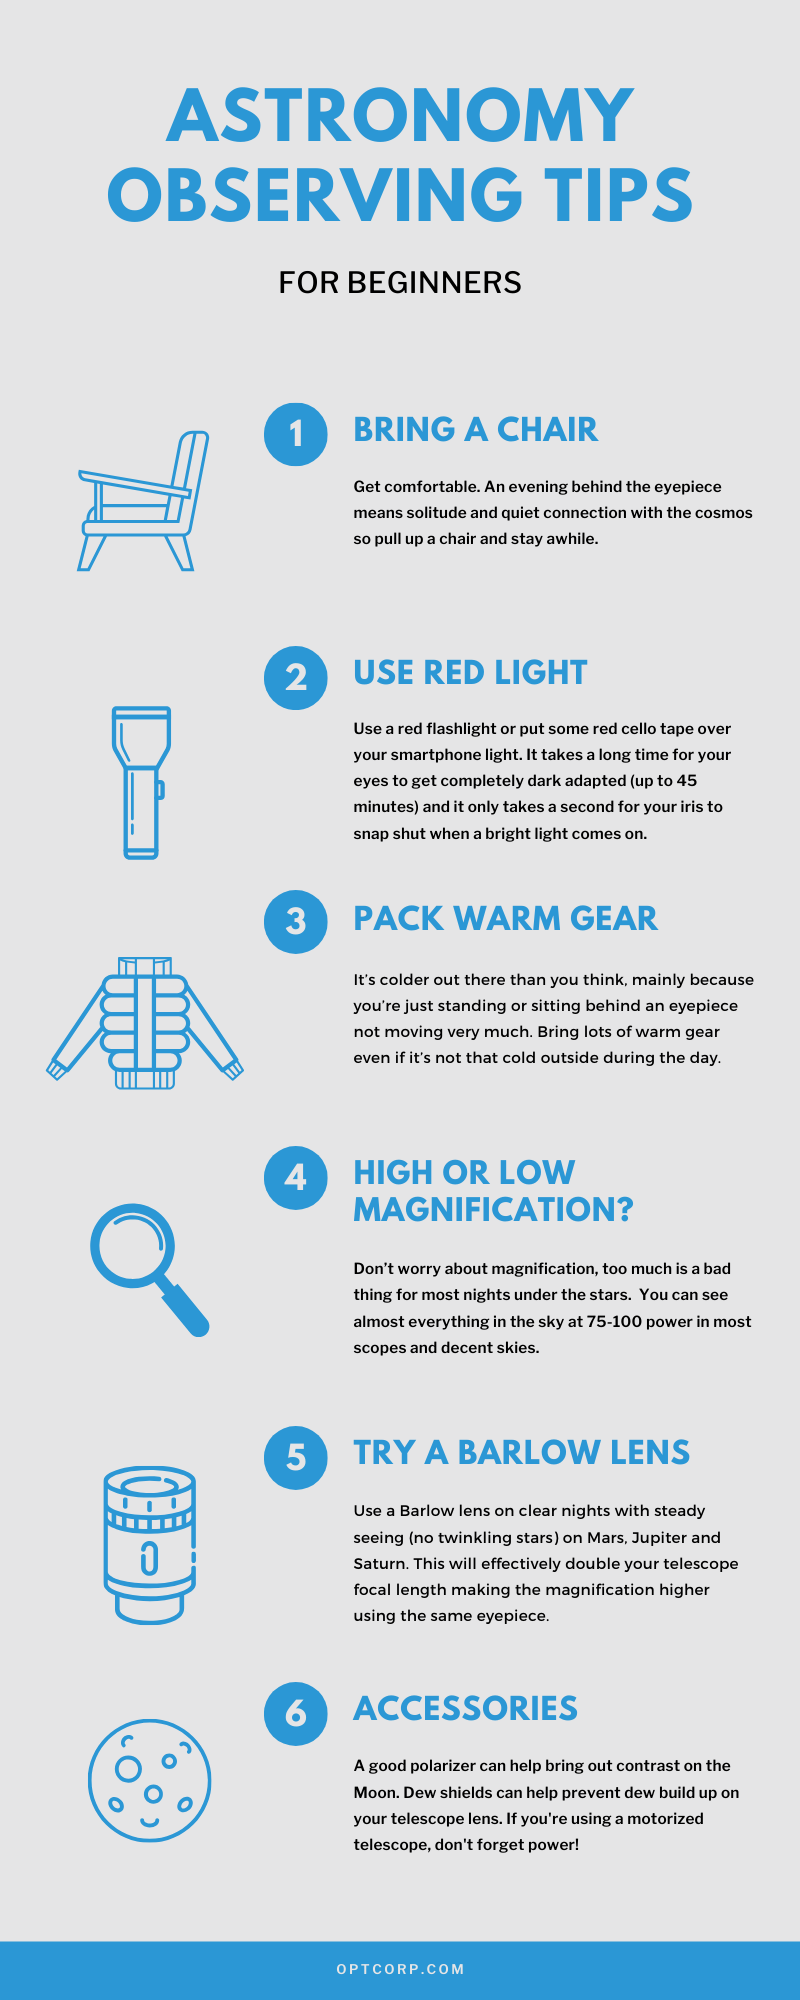
- Don’t worry about magnification, too much is a bad thing for most nights under the stars. You can see almost everything in the sky at 75-100 power in most scopes and decent skies.
- Bring a chair and get comfortable. An evening behind the eyepiece means solitude and quiet connection with the cosmos, so pull up a chair and stay awhile.
- Get a red flashlight or put some red cello tape over your smartphone light. It takes a long time for your eyes to get completely dark-adapted (up to 45 minutes), and it only takes a second for your iris to snap shut when a bright light comes on.
- It’s colder out there than you think, mainly because you’re just standing or sitting behind an eyepiece not moving very much. Bring lots of warm gear even if it’s not that cold outside during the day.
- The edges of your retina can see dimmer than the center. For really faint objects like galaxies, point your eye a little to the edge of the field of view and try to resolve the galaxy using the edge of your eye. Takes practice, but you’d be surprised at the small details that jump out at you while doing this.
- Use a Barlow lens on clear nights with steady seeing (no twinkling stars) on Mars, Jupiter, and Saturn. This will effectively double your telescope focal length making the magnification higher using the same eyepiece.
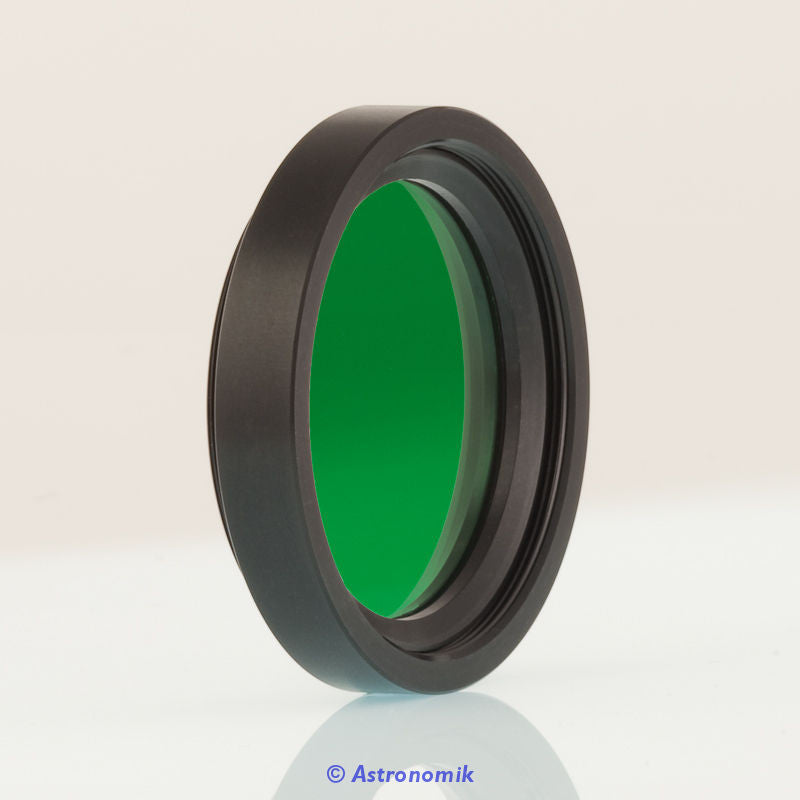
- A good polarizer can help bring out contrast on the Moon.
11 Responses
Best Telescopes Guide
I have also created Best Telescopes Guide Website using these templates you may check it from here
About us
Best Telescopes Guide
I have also created Best Telescopes Guide Website using these templates you may check it from here
see more
Best Telescopes Guide
I have also created Best Telescopes Guide Website using these templates you may check it from here
<a href=“https://www.besttelescopesguide.com/”Best Telescope guides
Best Telescopes Guide
I have also created Best Telescopes Guide Website using these templates you may check it from here
<a href=“https://www.besttelescopesguide.com/”Best Telescope guides
Nick Marble
I figured out what I did wrong (see comment dated March 30) …just a rookie mistake: I had not focused the star.
Nick Marble
I went out a few nights ago with my new Celestron NexStar 8SE. I thought that I was focusing in on Sirius, but all I got was a big black circle surrounded by lighter stuff. What did I do wrong? I had the star smack dab on my red dot finder.
Clarity Scopes
Thank you fro sharing such an informative article about telescopes. Many beginners find it difficult to choose new telescopes. As an optical distributors, Clarity Scopes provides the best telescopes for novice enthusiasts. Visit us at https://clarity-scopes.com
Sandy Walling
I have a go to celestron that does not work and that has been disappointing and now own an 8 inch dobsonian Apertura. I get disappointed at my inability to see things as closely as I thought I would. My celestron 15×70 binoculars give just as good a view. What the heck am I doing wrong? I am retired and learning astronomy has been such a desire for years. I would love some elementary advice. I am thinking it is my eye pieces.
OPT
Hi Jim, congratulations on your first telescope! Thank you for this valuable feedback. While we work on this update, please contact us at 800-483-6287 if you have any more questions. Clear skies!
Jim
A legitimate gripe: Most experts who are attempting to explain things to a novice listener, ie., a student, forget an important point of teaching. The expert forgets who they are talking to and present the information as if they are talking to a peer who automatically understands all the vocabulary, acronyms, and references the teacher is using. Although most students must accept the burden of learning the specific vocabulary, and that comes with time and use.
An example taken from the above article: “A good polarizer can help bring out contrast on the Moon.” That’s nice, but? ? ? What is a “polarizer?” Is it something I wear on my eyes? Something attached to the eyepiece". something that goes over the aperture? What is considered “a GOOD polarizer” as opposed to a bad polarizer? Apparently there are various qualities of polarizers? Although I’m 80 years old, this is my first year with a telescope, so treat us like new-born babies and pablum talk. It will go a long way in our understanding of what you’re talking about. Appreciatively, Jim



Best Telescopes Guide
December 01, 2022
I have also created Best Telescopes Guide Website using these templates you may check it from here
About Us