


Planetary Imaging for Beginners (with Gear Guide)

Solar System Family Portrait by Andrew McCarthy
Have you ever looked up at the stars and seen one shining much brighter than all the rest? If so, there's a good chance you were looking at one of the planets in our own solar system. But did you also know that with the right equipment, you can capture them in incredible detail, right from your very own home? In this blog post, we'll go over what you need to know and what gear you need to get started with the amazing hobby of planetary imaging.
Planetary Imaging Basics
What Is Planetary Imaging?
Planetary imaging is the practice of photographing the planets, sun, and moon within our solar system. Planetary imaging is a type of astrophotography, and differs from deep sky astrophotography in that its aim is to capture objects within our solar system. Many beginners might be surprised to learn that the equipment used for planetary imaging can be vastly different than what is needed for deep sky imaging. Don't worry, though! By the end of this blog post, you'll have a good understanding of what gear is best used for planetary imaging.

Saturn by Gary Varney
One of the biggest allures to planetary imaging is that it doesn't matter how much light pollution you live in — you can still image the planets from anywhere because they're so bright. In fact, every image you see in this blog post was captured from heavy light pollution by our talented affiliates and employees. Unlike deep sky objects, the planets are constantly changing. They get closer and farther away from us, with the closest pass known as an opposition. Each planet also spins on its own, showing new surfaces all the time, and some disappear from our night sky for months on end. The moon's different phases and craters keep it interesting, and the sun's surface is perpetually morphing, with sunspots, prominences, and even massive coronal mass ejections. And the best part? You can capture all of it — with the right equipment, of course. Before we dive into what gear you need, we'll first cover a few fundamentals that every budding planetary imager needs to understand.
What is Astronomical Seeing?
Astronomical seeing is the reason why stars appear to twinkle. This is caused by turbulent air in the Earth's atmosphere, and it constantly affects planetary views and images. Think of heat waves rising off of a hot road — it blurs and distorts the view. Poor atmospheric seeing has a similar effect on our views of anything in outer space:

Atmospheric seeing's effect on the star Sirius
When capturing planetary, lunar, or solar images, images can be greatly improved just by capturing them during periods of good astronomical seeing. Compared to the twinkling of the stars we see with our naked eyes, the effects of poor astronomical seeing through a telescope are greatly amplified. Further still, when using a planetary camera with a small camera sensor on a telescope, the turbulent effect is amplified even more. During periods of poor seeing, this can cause the planets to appear as shaky, blurry blobs, even on the best telescopes:
During periods of excellent seeing, however, the planets will appear much more stable and detailed:
Astronomical seeing conditions can vary from night to night, hour to hour, minute to minute, second to second, and even between fractions of a second, so it can be difficult to predict when good seeing occurs. Some weather forecasts, like Astrospheric and MeteoBlue, offer localized astronomical seeing predictions, but these are only so accurate. Your location can also impact astronomical seeing greatly. For example, some of the best seeing conditions are usually found at high elevations close to oceans, which is why sites like Mauna Kea in Hawaii are often chosen for the world's premier observatories. It's also why some telescopes, like Hubble, are in space — so they can avoid the effects of Earth's atmosphere entirely. To capture the planets during good seeing, you really just need to get lucky. So how do planetary imagers capture such sharp images of the planets?

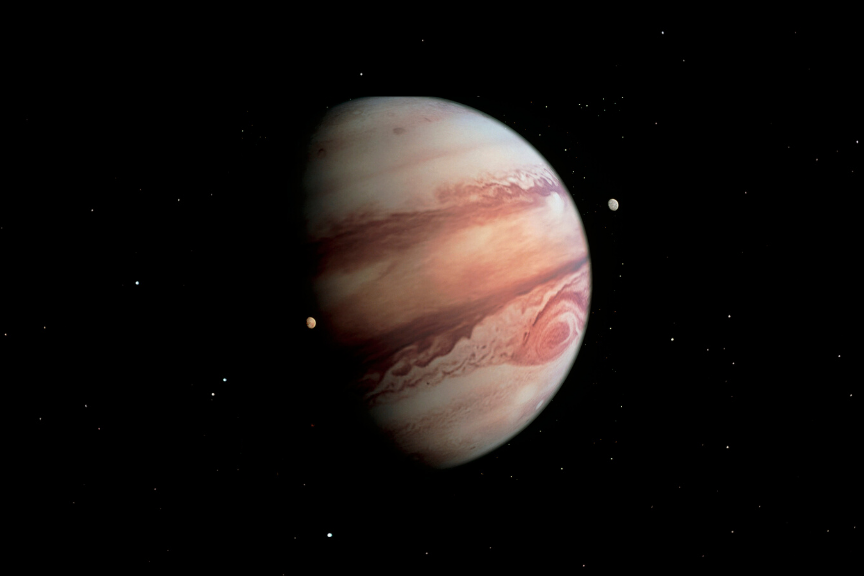
Jupiter and three Galilean Moons by Gary Varney
The Lucky Imaging Technique
Lucky imaging is a technique used to capture the planets, moon, and sun in extremely high detail. Lucky imaging works by capturing hundreds of frames per second using software like FireCapture. Then, using separate software to select only the sharpest frames out of thousands, you can effectively throw away all of the frames that were blurry and affected by poor astronomical seeing. Even during periods of average seeing conditions, there will occasionally be a split second of excellent seeing. By capturing high frame rate video for seconds or minutes at a time, you're more than likely to capture a few moments where the planet appeared very sharp. This is how lucky imaging gets its name. You can then use software to pick out those sharpest frames, and then stack them together to reduce noise.

Panorama of the Lunar Limb by Gary Varney
Framing The Planets, Sun, and Moon
The planets are small. So small, in fact, that even during their closest approaches to Earth, it's nearly impossible to fill the entire planet in your telescope and camera's field of view. You'll almost always need to crop in unless you're using a massive telescope and a tiny sensor camera. The sun and the moon, on the other hand, will appear gargantuan in comparison, and most planetary cameras can only capture a small region of the sun or moon's surface. To get an idea of how large and small the planets will be with any given telescope, camera, and Barlow lens, head to the Astronomy Tools Field of View Calculator and choose a solar system object. We strongly recommend you use this tool to help you pick out planetary imaging gear.
Stacking & Processing Planetary Images
Like deep sky images, planetary images are best when you stack them to reduce noise. Software like PIPP is designed for pre-processing planetary images before stacking by selecting the sharpest frames and cropping them.
Once you've finished in PIPP, you can bring the images into RegiStax or Autostakkert! for stacking.
Finally, you can actually process (edit) the image to your aesthetic liking in software like GIMP or Adobe Photoshop.
 International Space Station passing in Front of the Sun by Mack Murdoc
The Best Gear for Planetary Imaging
Which Telescope is Best for Planetary Imaging?
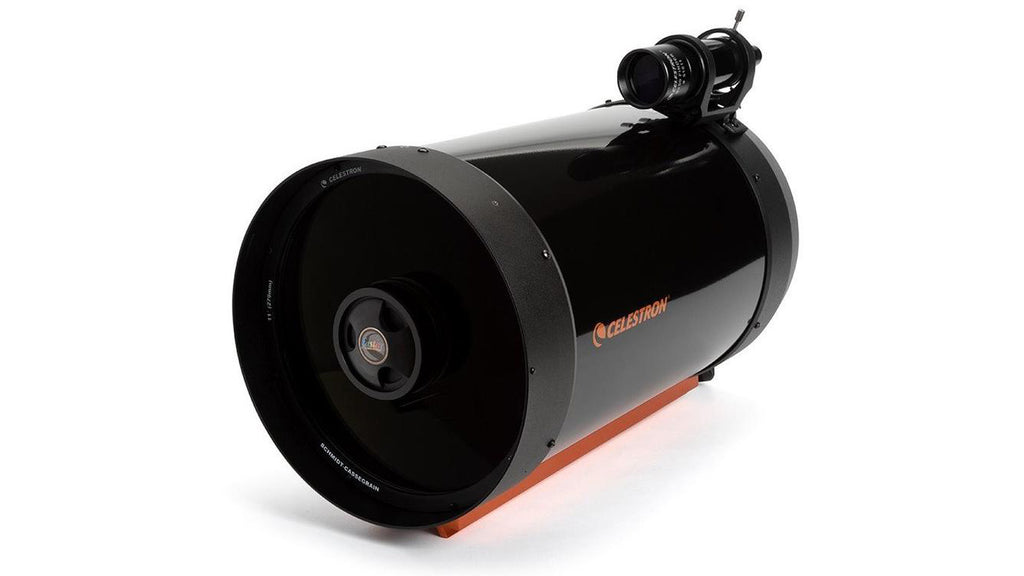
The Celestron C11 makes for an excellent planetary imaging telescope
The planets are extremely small, and for that reason you need to use a very long focal length lens, or even more ideally, a telescope to capture them well. It's generally not possible to capture any surface details on the planets with telescopes or lenses under 500mm in focal length. Good telescopes for planetary imaging start at around 2000mm focal length and up. Aperture is also important, as the larger the aperture, the more resolution on planets can be resolved. Unlike with deep sky imaging, telescopes with slower/longer focal ratios are preferred, such as f/10.
Schmidt-Cassegrain Telescopes, or SCTs for short, are widely regarded as some of the best telescopes for planetary imaging because they check all of the above boxes. SCTs are the preferred telescope of choice for famous planetary imagers like Damian Peach and Christopher Go. These telescopes feature a long focal length and a large aperture in a small package, making them great choices for planetary imaging. Both Celestron and Meade make great SCTs for planetary imaging. If you're looking for a telescope that can excel at both planetary and deep sky, the Celestron EdgeHD and Meade ACF series telescopes are a great choice.
SCTs aren't the only telescopes that can do planetary imaging, though they are generally regarded as the best choice. Other telescope types that can produce good planetary images are Maksutov Cassegrains, larger Newtonians and Dobsonians, and larger aperture refractors. If you're interested in solar imaging exclusively, check out a dedicated solar telescope too!
Which Mount is Best for Planetary Imaging?
 The Celestron CGX Equatorial Mount is rock solid for planetary imaging
With any telescope, you're going to need a proper mount that can carry it. If you're a deep sky imager, you might know that the mount is arguably the most important part of any rig. It's also advised that you keep your total payload at around half of the capacity for the mount. Fortunately for planetary imaging, neither of these statements really apply. You can push the mount to around its total weight capacity because you don't need to track objects during long exposures.
Some planetary telescopes, like the Celestron NexStar SE and NexStar Evolution series come with an altitude-azimuth mount attached to the telescope. Altitude-azimuth mounts, or alt-az, can work fine for planetary imaging. This can cause some slight field rotation, which can be processed out in software later. Like deep sky imaging, though, an equatorial mount is generally preferred.
Which Camera is Best for Planetary Imaging?
 The ZWO ASI462MC is a great beginner planetary camera
Since the planets are so small, it's best to use a planetary camera with a small sensor to capture them. If you use a large sensor camera like a DSLR or cooled astronomy camera for deep sky imaging, you'll only end up capturing a very small planet surrounded by an almost entirely black image. The other benefit of using a small sensor camera is that they have very fast frame rates, usually in the range of hundreds of frames per second. This is necessary to capture the planets during small windows of good atmospheric seeing as mentioned earlier. To support these ultra-fast frame rates, you'll want to look out for cameras that use USB 3 ports. For ZWO cameras, this means avoiding the "mini" versions as those are used for autoguiding.
Both ZWO and QHY make excellent cameras for planetary imaging. There are both color and monochrome versions for many planetary cameras, and you might be wondering "which one is best for me?" The short answer is that color cameras are going to be the less expensive and easier to use option. The longer answer is that monochrome cameras are going to require the addition of a filter wheel and planetary filters to produce a color image, but they ultimately give slightly more resolution and control.
Which Accessories are Best for Planetary Imaging?
 The TeleVue Powermate series are highly-regarded extenders for planetary imaging
Without a doubt, one of the best accessories for planetary imaging you can buy is a quality Barlow lens or focal extender. Barlows magnify your telescope's focal length by 2x or more. Since the planets are so small, many planetary imagers utilize Barlows to get that extra reach. The TeleVue Powermate series is a great choice for planetary, and the TPO Barlows make for a solid budget option.
Another wildly popular accessory for planetary imaging is the ZWO Atmospheric Dispersion Corrector (ADC). This brilliant little device lets you tune it to correct for color separation caused by the Earth's atmosphere. When the planets are low in the sky, the atmosphere can cause colors to refract and reach the camera at slightly different points. This causes color fringing on the planets, even with perfect optics in your telescope. With the ADC, you can tune it so that each color arrives at the same plane, and your images will be better as a result.
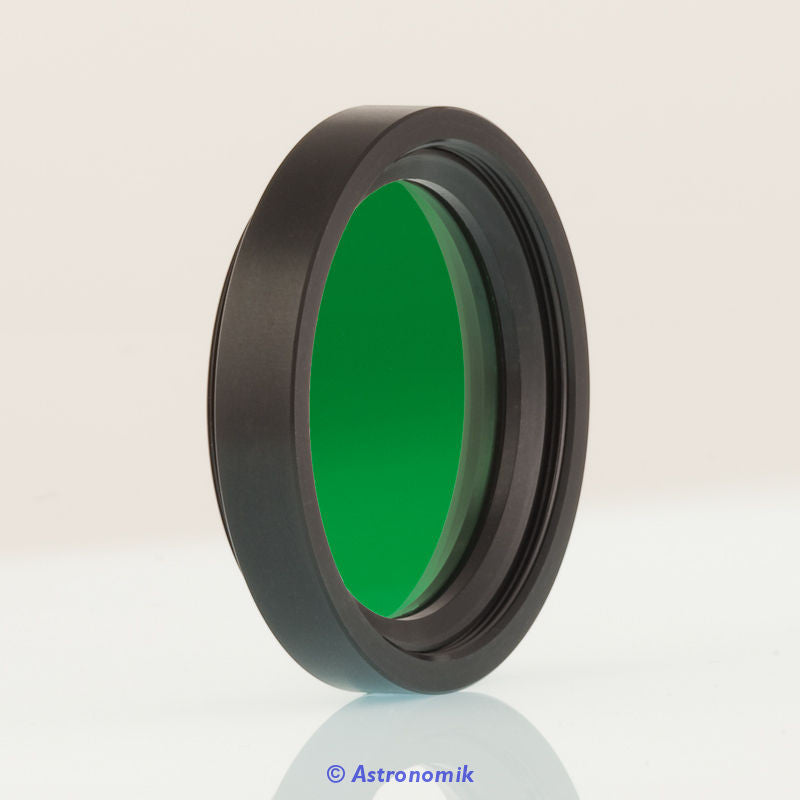
Last but not least, planetary filters can make a dramatic difference in your images. This is true for both color and monochrome cameras. Filters can have different effects on various planets. For example, an Infrared (IR) Pass filter can give better seeing than visible light and penetrates through planetary atmospheres. An IR Pass filter like the Astronomik Planet IR Pro 742 Filter is a great choice. If you're using a monochrome camera, you'll need a good set of RGB filters and a filter wheel, too.
Example of a Planetary Imaging Train

When you've got all of the gear we mentioned earlier put together, it will look something like this! From left to right: 1) the telescope, a Celestron EdgeHD 2) T-adapter 3) a Barlow lens 4) a filter wheel, and lastly, 5) the planetary imaging camera.
How to Safely Image the Sun

First and foremost, you should never look at or point your telescope at the sun without the proper solar safety equipment. Doing so can cause blindness to your eyes or permanently damage your camera. Remember, a telescope gathers hundreds of times more light than your naked eye does, so the effect of the sun is greatly amplified whenever a telescope is pointed at our own star.
To safely image the sun, proper equipment is required. Perhaps the easiest and least expensive way to image the sun is by using what's known as a white light solar filter. These filters are inexpensive and made of solar film or glass that goes over the front of your telescope and darkens the sun by hundreds or even thousands of times. With a white light filter, you can visually observe or image the sun safely. To figure out the right one for you, you first need to measure the outer diameter (OD) of the front of your telescope. This means the total diameter of the dew shield or body of your telescope. You can then use our helpful solar filter cheat sheet to find the right size solar filter based on your telescope's OD. These filters are great for solar eclipses, but won't capture much detail on the sun's surface.
To capture surface detail like in the image of the sun and space station above, you need either a dedicated solar telescope or a special filter. Both options employ what's known as a hydrogen alpha filter, which only lets a small portion of reddish-orange light through to reveal hidden surface details on the sun. Dedicated solar telescopes give the best results, but can get expensive quickly, and most can only be used to observe or image the sun. Some options like the Daystar Solar Scout, Lunt Solar 50mm, or Coronado PST can be great entry-level hydrogen alpha solar telescopes.
As an alternative, the Daystar Quark is a specialized hydrogen alpha solar filter that can attach to most existing telescopes. It attaches in place of an eyepiece, and you can attach a planetary camera or eyepiece to the back of it. The Daystar Quark produces fantastic solar images, including the one below. It has a 4.2x Barlow lens built in for extreme close-up views of the sun, and works on most telescopes including refractors and SCTs.

Solar Prominence by Mack Murdoc
After reading this guide, we hope you feel ready to tackle the wildly rewarding hobby of planetary imaging! As always, if you have any questions, leave a comment below or contact our helpful Sales Team. Clear skies!


Tony Vrtis
July 14, 2022
I have an Explore Scientific ED127 FCD100 refractor. I’m exploring the idea of using it to capture solar images and particularly prominences similar to the Marc Murdoc’s image show in this artical. The artical mentions using a Daystar Quark in the location of the eyepiece. To protect the telescope itself don’t I still need an additional solar filter attached to the dew shield? Assuming I could choose any ZWO camera I wish, what would be the best choice for the imaging camera? Monochrome or Color and should it include cooling capability? If I pursue solar imaging I want to make sure I do it safely and have acquired the right gear set to be able to capture outstanding images similar to Marc’s. Thanks for the assistance. Tony Vrtis