


Imaging with Mosaics in TheSkyX- Wide F.O.V. Astrophotography - Video
Imaging with Mosaics in TheSkyX- Wide F.O.V. Astrophotography

TheSkyX provides a large number of tools for imaging, but few are as specifically suited for widefield astrophotography as the “Mosaic Grid” feature. This video and walkthrough will show you how to make the most of this feature.
Mosaic Grid Uses
There are two typical uses for the Mosaic Grid. These are:
*Imaging large portions of the moon
*Imaging deep space objects larger than your system’s FOV
Field of View
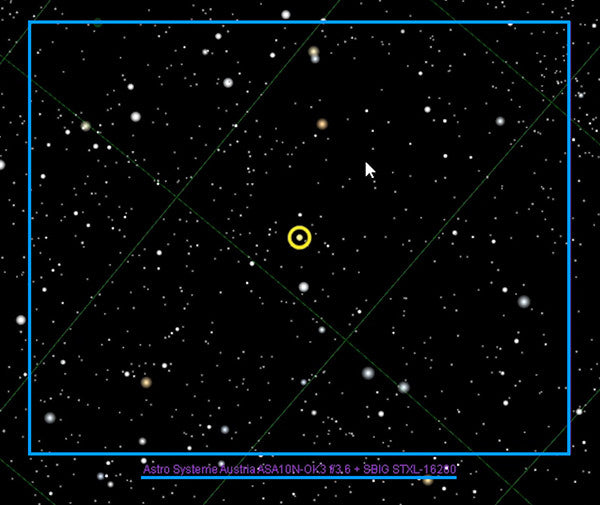
In order to get started in TheSkyX, you’ll need to designate the “Field of View” you will be using. This is dictated by the telescope, camera, and other equipment that make up your imaging system. For the purposes of this video, the Field of View used here consists of a 10” ASA Newtonian (Product #A2-0100024A) and an SBIG camera (SB-STXL-16200) for imaging.
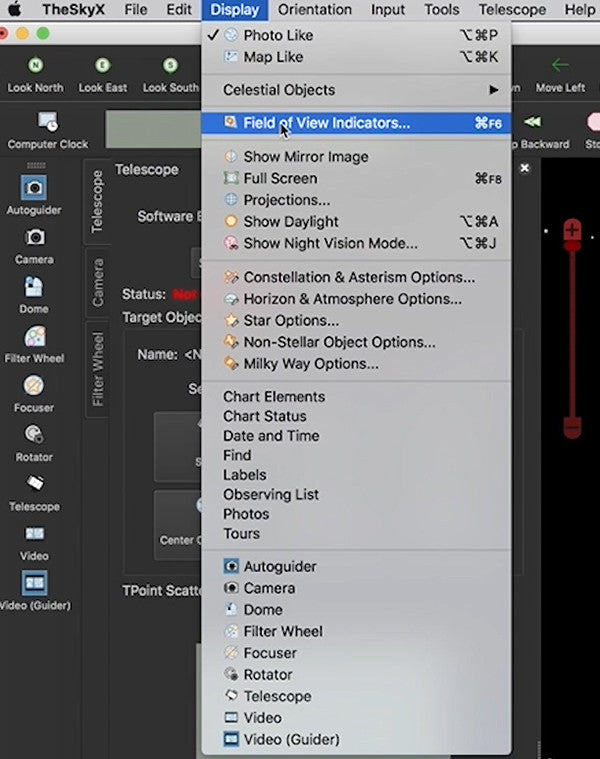
To set this up your own Field of View in TheSkyX, go to the top of the screen and select “Display” > “Field of View Indicators” to bring up the necessary menu.
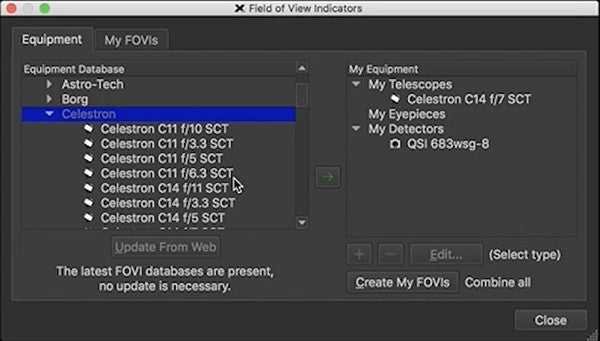
Choose the items that make up your imaging train from the available equipment and finalize your selection. For more information on Field of View Indicators, you can check out our previous video on the topic.
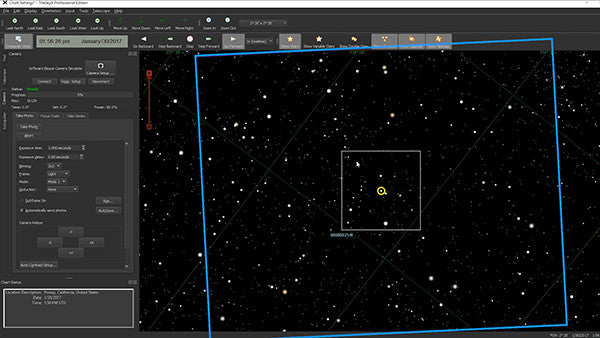
Once your Field of View has been properly configured, you’ll need to make sure that your view is properly rotated in space as well as on your sky chart.
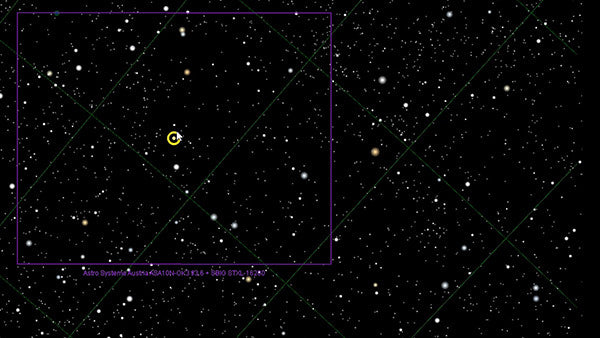

To do this, click to select a random spot in space and take a photo to send it to Image Link.
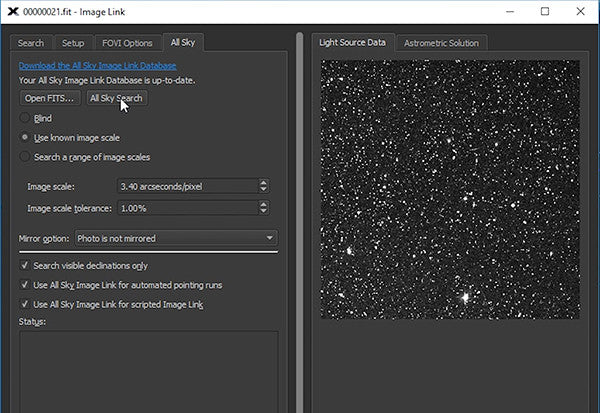
Once the Image Link window pops up, click the “All Sky Search” button on the “All Sky” tab.
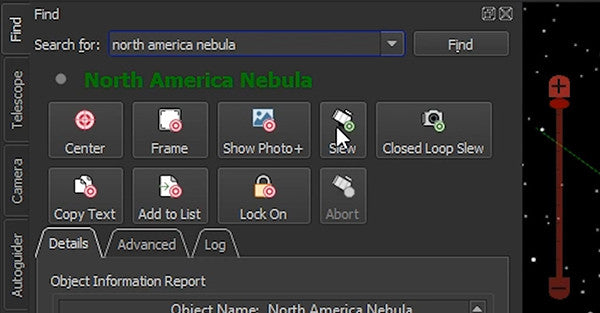
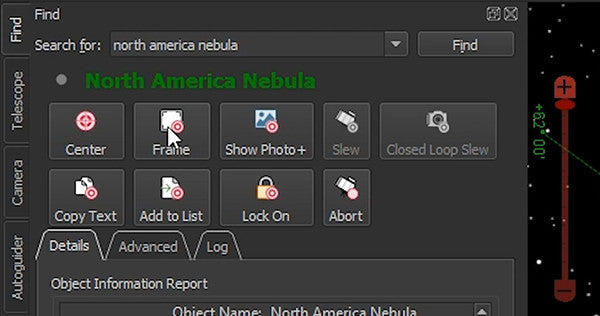
Next,enter the name of an object in the"Search for:" text field and then click the "Find" button. After this, click “Slew” and then “Frame” to realign your view.
Setting Up The Mosaic Grid
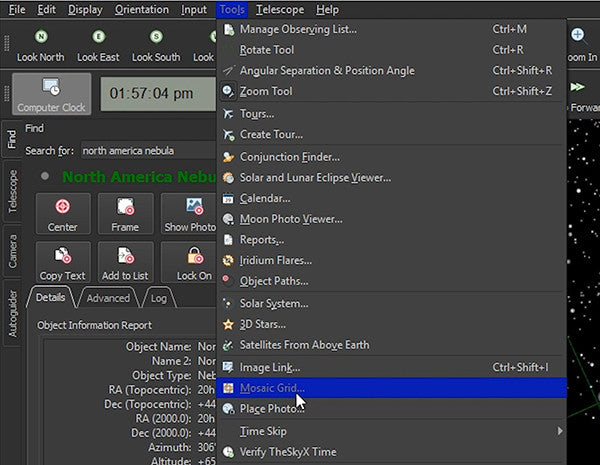
After your Field of View has been properly aligned we can start properly configuring and using the Mosaic Grid. For this step, choose the “Mosaic Grid” option from the “Tools” menu.
The grid should display with the default or most recently used settings, but if it doesn’t display, close and reopen the dialog box. This should prompt it to display.
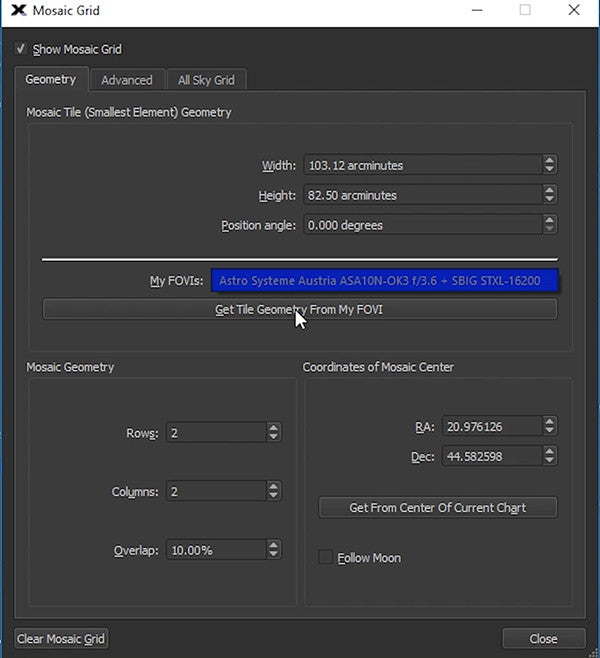
Once the grid is properly displayed, choose your previously-configured Field of View setup by clicking on the dropdown next to “My FOVIs” and selecting your FOVI equipment. After this, click the “Get Tile Geometry From My FOVI” button.
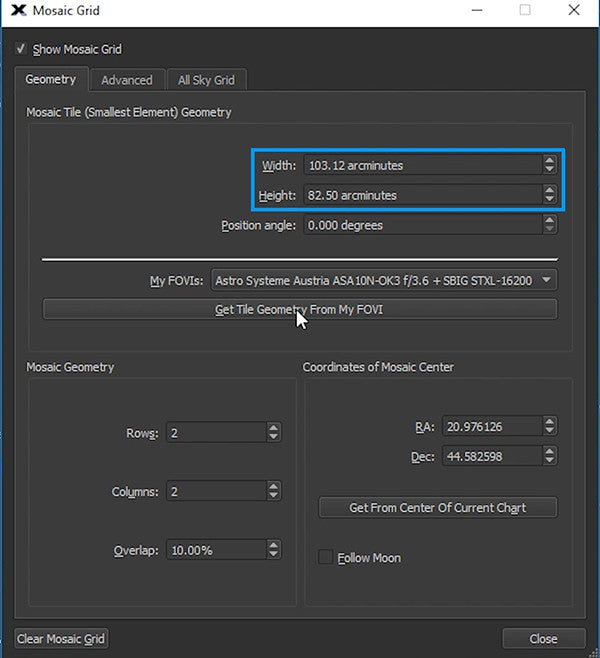
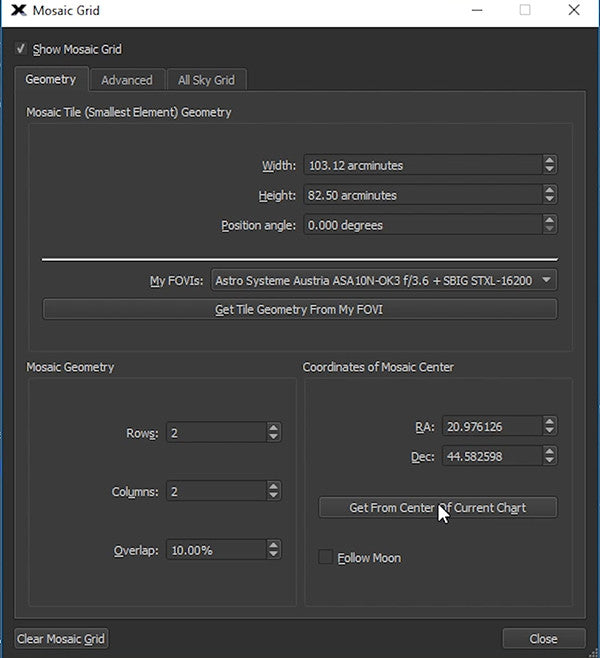
With this done, enter the appropriate width and height of your intended mosaic and click the “Get From Center Of Current Chart” button.
The position of your Mosaic Grid can be re-positioned by clicking and dragging on the circle at the center of the grid. If you don’t have a rotator for your system, you can manually adjust rotation by rotating your camera, taking an image, and then image-linking it to generate a new field of view.
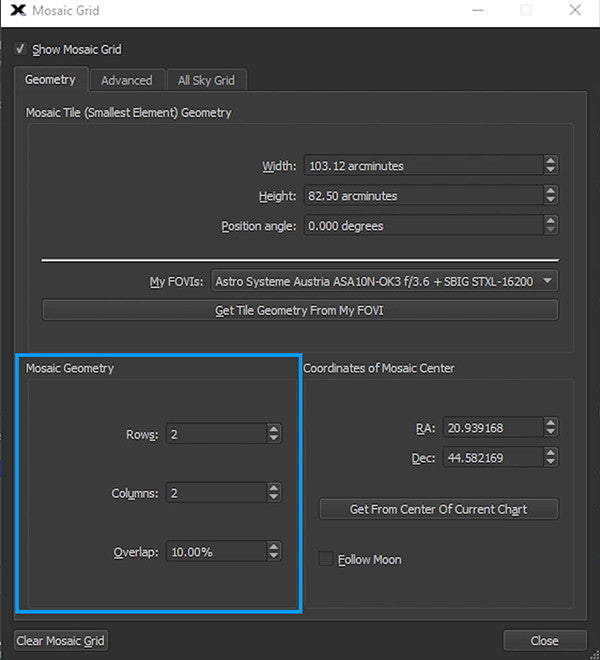
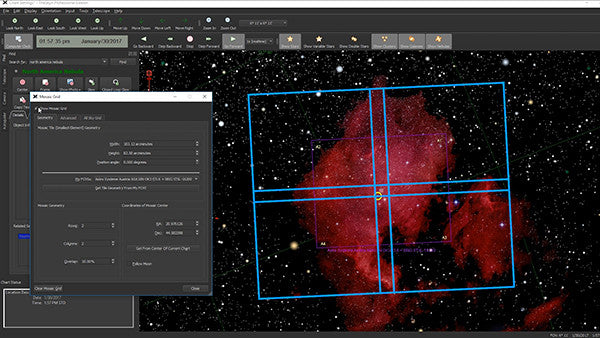
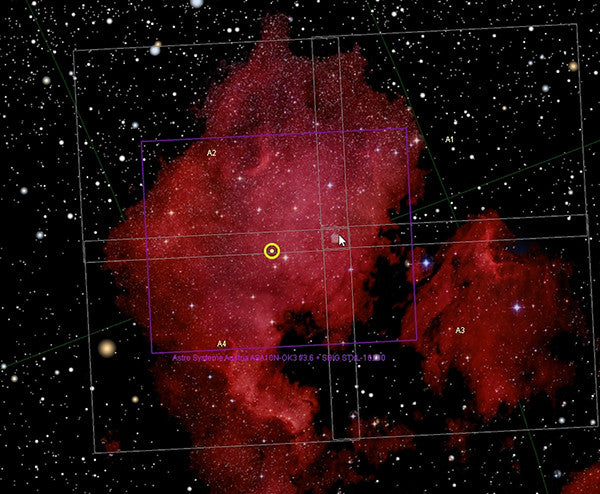
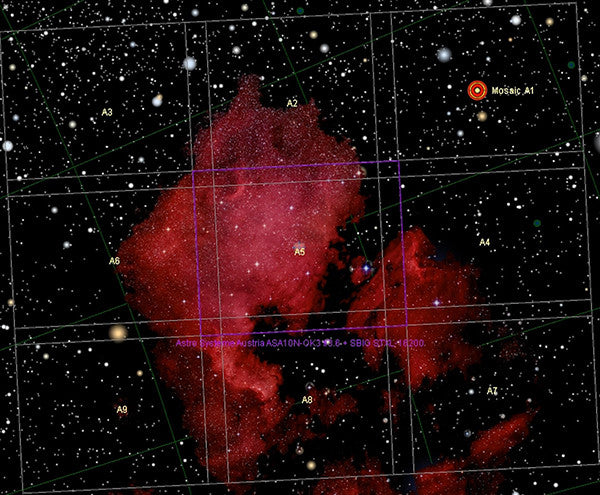
Next, you will need to configure the “Mosaic Geometry” of your mosaic. This is done by entering the “Rows,” “Columns,” and “Overlap” for the grid (defaults being 2x2 with a 5% overlap.) This dictates the number of images in your grid, represented by boxes, as well as the degree to which they overlap with each other, represented by the smaller rows and columns in the grid.
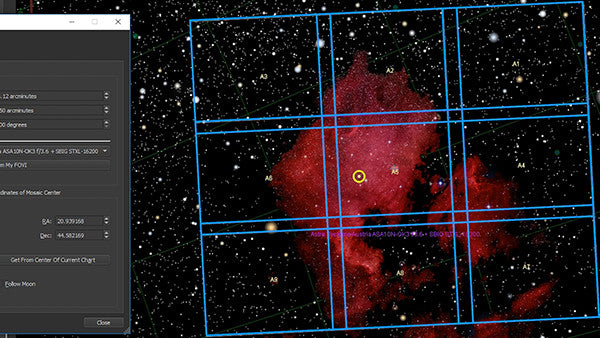
The boxes in the grid have their own designations, starting with A1 and increasing to A2, A3, etc. from right to left, top to bottom, with new rows overlapping to the right side. The individual pictures in your mosaic are taken by slewing to each box in number order and taking each individual image. Once you’ve taken pictures of each box you should have all the images that you need for completing your mosaic.
Closed Loop Slew
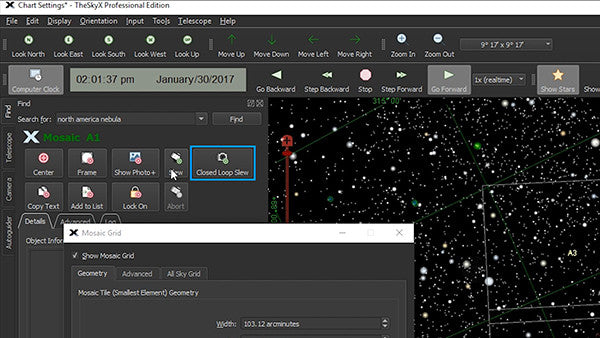
In some cases, you may not be able to take photos of the entire Mosaic Grid in a single night. If this is the the case, you can use TheSkyX’s “Closed Loop Slew” feature to return to the same position in the sky over the span of multiple nights.
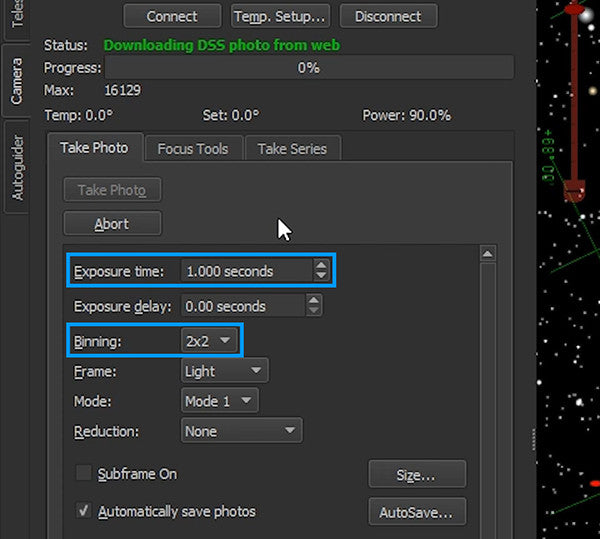
To start, slew to the first image in your grid (A1) and take an image using the current settings (here set to 1 second binned 2x2.) The images you take for this feature only need to have enough detail for the program to recognize that particular part of the sky, so not a lot of detail is needed.
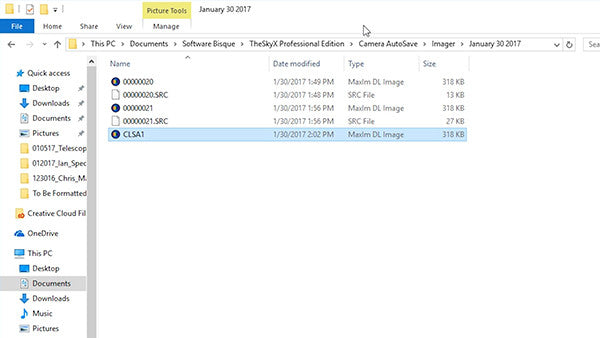
Once you have taken the photo of A1, locate the image file on your computer. In most cases this should have been saved to your default “Camera AutoSave” folder. Since the default name of files taken with TheSkyX can be cumbersome, it’s a good idea to rename it to something a bit easier for you to personally recognize for future reference. This image can be used to return to the same spot on subsequent nights.
Moon Mosaics
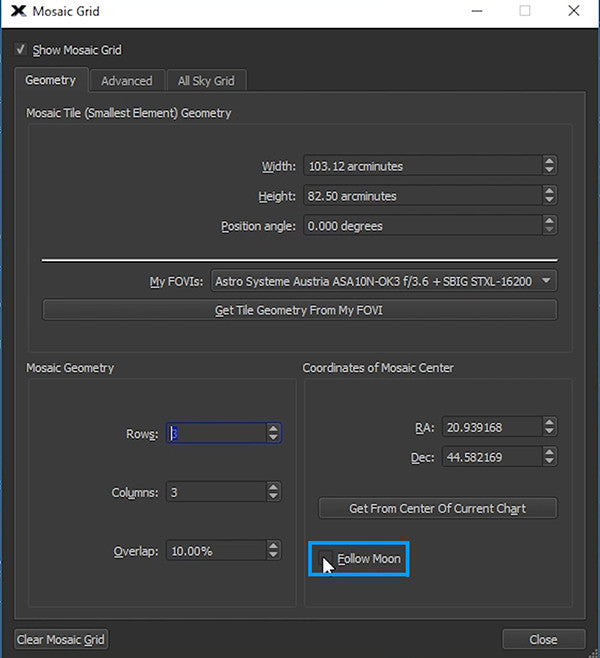
If you’re taking a mosaic of the moon, TheSkyX has some built-in features that will help with taking pictures of the moon. By clicking on the “Follow Moon” box on the “Mosaic Grid” box. Doing so will help TheSkyX better match your images to the moon’s sidereal rate.
Conclusion
Hopefully this video will get you started using TheSkyX’s Mosaic Grid feature. If you have any questions or are interested in purchasing TheSkyX or any astronomy equipment, feel free to contact OPT.