


Simple Processing for Triad Filter Imaging
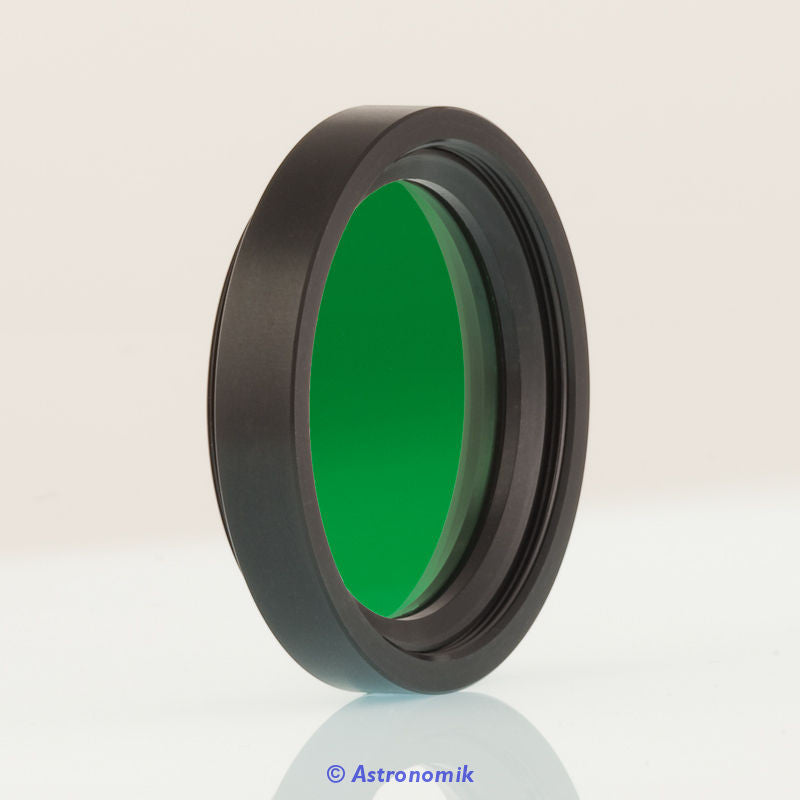
The Triad filter is a revolutionary filter that provides narrowband imaging with one-shot color cameras in just about any light pollution conditions.
How to Get the Best Image Processing Results with the Triad Filter
The method presented in this video is just one way to process a TRIAD filter image and you may discover other methods that work equally well. However, if you feel lost and aren’t sure where to start with processing TRIAD images, then this tutorial is definitely for you.
How Does the Triad Filter Work?
Triad filters work by isolating hydrogen-alpha in the red and the oxygen and hydrogen-beta lines in the blue and green channels, allowing you to capture a narrowband image without the need for multiple narrowband filters or a filter wheel.

In this tutorial, we will give you a run-through of how to process images shot with the Triad filter.

The image used for this tutorial was taken from the previous OPT parking lot with about a Quarter Moon rising, which added even more pollution to the already light-polluted setting.

Despite intentionally hindering our conditions, Triad-filtered images taken directly from the camera appear fairly dark, showing some stars but not much else. This is a testament to just how well the Triad filter blocks light pollution.
How to Process Triad Filter Images in Photoshop
Follow the steps in our images below to have a clear path on effectively processing images using the Triad filter.


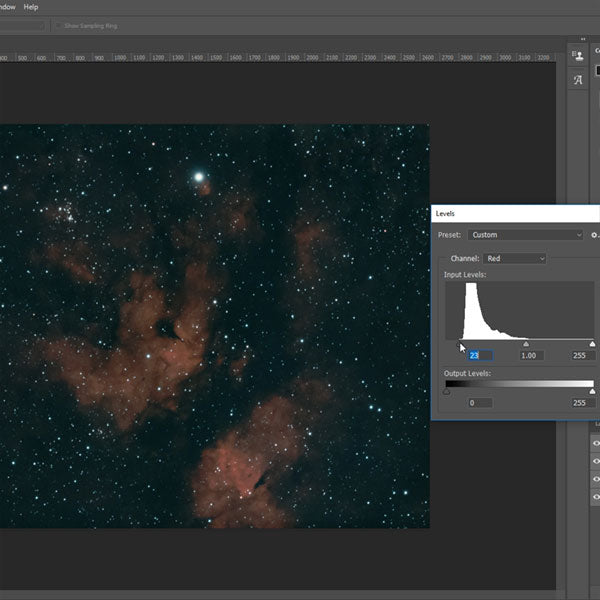
Since the default image is so dark to the human eye, you’ll need to use some other means to assess the image. This can be done using the Levels function, which lets you see how dark the image truly is, in terms of color information. Prior to processing, a Triad filter image has a very strong, yet narrow, color range.

This is the result of only letting through a little sliver of light at hydrogen-alpha and another narrow band for the hydrogen-beta and oxygen-III lines. While what is visible on the graph doesn’t seem like much, you’d be surprised how much color can be gleaned from the small ranges of light that the Triad allows through.

This tutorial incorporates some features that are new to Photoshop CC, such as the Raw Converter. This latest iteration can be used on any image, whether it’s a DSLR RAW file or not, which is a feature we make use of later in this tutorial.

This tutorial also makes use of an after-market Photoshop filter known as the GradientXTerminator plug-in created by RC Astro. This filter costs $50, so if you already have another preferred method of removing gradients from images, that can be substituted instead.
Dedicated astrophotography programs such as PixInsight or Nebulosity have their own built-in gradient removal tools, if you are comfortable with those, you may not need RC Astro’s filter. However, since GradientXTerminator integrates directly into the Photoshop filter menu, it is useful for more Photoshop-centric workflows, which is why it is being used for this tutorial.
Simple Image Stacking in Photoshop Tips
The image seen here is actually the result of several images that were combined to create one image. These were aligned and stacked in Nebulosity and then flattened down to the single, final image. While Nebulosity and other programs are ideal, it is possible to dosimple stacking in Photoshopif you only have a handful of images to stack. Check out the video below to learn more about this process.
Using Curves and Levels in Photoshop for Image Processing
Read on to follow a step-by-step astrophotography tutorial on using Photoshop for image processing!


Start out with an aggressive curve to bring up the information. In doing so, you can start to see some nebulosity. As you move the curve watch out for moving too far off and cutting-off color information.

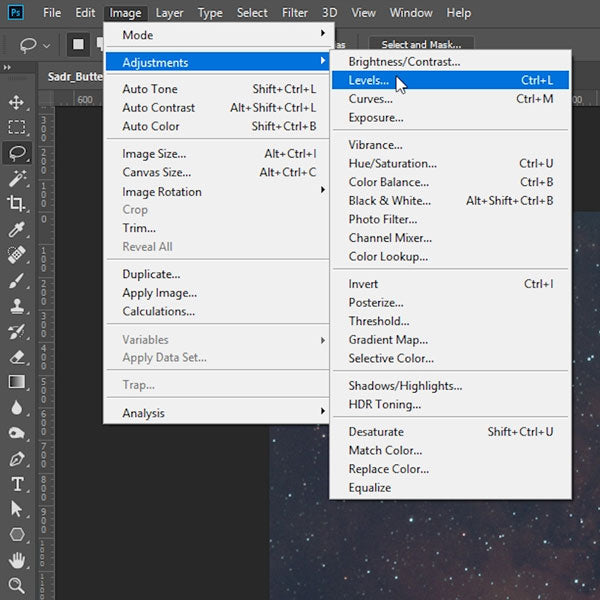
Next step, click on the "levels" icon in "adjustments." Bring up the black point while being careful not to lose too much information.

As the levels are adjusted you start to see the reddish hydrogen coming through very clearly.
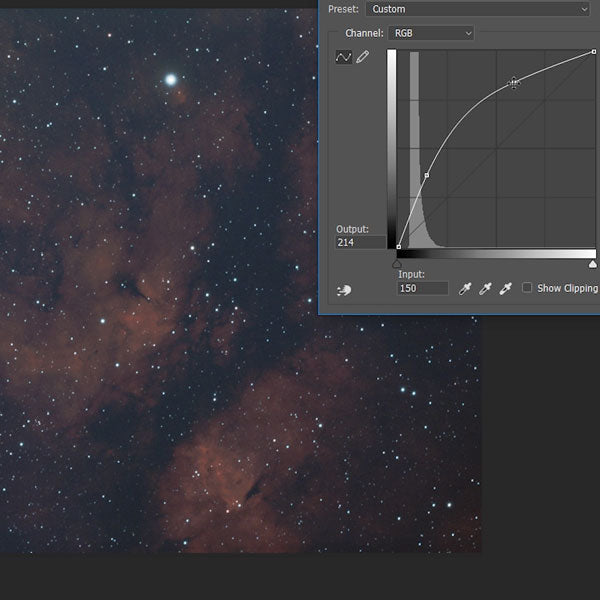
After this, open "curves" in the "adjustment" tab on the right. Adjust more subtle than the first time. The goal is to bring out the background colors.
Next, click on "levels" again. You start to see some gradient in the background. This is because the image was taken with a fairly extreme amount of light pollution in the sky and without the use offlat frames. In this case, taking the “lazy way out” and not using flats means having to deal with more in the way of gradients.


With this second round of levels, set the black point for each of the three channels individually. In doing so, you will see a slight blue shift in the background, which is a result of the hydrogen-beta and oxygen-III bands being a little broader to encompass both of those wavelengths. This has the consequence of letting in far more in the way of blueish light, while the red channel, which is isolated hydrogen, shows a more defined contrast.

After this second "levels" adjustment, do one more "curve" adjustment to get the image moderately bright. In doing so, you will start to see some of the gradient intrude.
What is the Bayer Matrix?
Now, because the image was the product of a color camera, it ultimately had to pass through the camera’sBayer matrix.

A Bayer matrix is the pattern of filters laid over a sensor’s pixels that make it into a color camera. This consists of a repeating pattern of four pixels in a sequence of red, green, green, and blue. A byproduct of this filter is that only one out of every four pixels picks up red light and the other three-quarters share the blue and green light between them. Any restrictive filtering like the Bayer matrix brings the risk of added noise, and there is some additional noise added by the Triad as well. However, anyone who’s shot narrowband images in monochrome knows that noise is just a fact of life when it comes to narrowband filters.
How to Reduce Noise in Image Processing


To help remove noise, we can use the Camera Raw filter. The Luminance slider in the Noise Reduction section should be pushed to around 20-25 and the Color slider pushed up a little higher than that. This will clean up a lot of the noise and help correct some small-scale color blotching, which can affect the gradient removal process.
Gradient Reduction with GradientXTerminator

Next, we will use the GradientXTerminator tool to remove the gradient. Using the Lasso or another selection tool, make a selection around the nebula or central object in your image. Don’t be too concerned with perfection in this step, as it’s not necessary for the gradient removal process to work. In fact, if the entire image is selected it won’t do much good for gradient removal. The area that has been selected reflects the area we want GradientXTerminator to ignore.


Select Inverse and then create a Feathered edge. Choose a Feather of about 20 pixels.

The GradientXTerminator menu has a very simple layout. We have Detail: Fine/Medium/Coarse and Aggressiveness: Low/Medium/High. The layout indicated here with Coarse Detail and High Aggressiveness with “Balance background color” checked will provide the best results for this particular image.

Running this does a pretty good job of cleaning up the blueshift in the background, as well as the dark lower-right corner and the overly-bright upper-left corner.
Curves and Levels in Photoshop

After this, make some additional adjustments to Curves and Levels. Once again, don’t push things too far, as you don’t want to blow out the stars in your image.

When adjusting Levels, adjust them for each color channel so that you can fine-tune the exact background color.

If the green channel is a little too hot and you have to push it really hard to bring out the color, don’t worry about cutting off data from this channel at this point in the process. There’s not a ton of green out in space, even when viewing with a narrowband filter, meaning that it’s not a terrible thing to let a little bit of it go.

“Season-to-taste” at this point, making fine adjustments to bring out the faint structure in the hydrogen, which shows up prominently in the red channel. While the green and blue channels look very similar, the blue channel brings in a little bit more of the hydrogen-beta and the green channel pulls in a little bit more of the oxygen.
Using the High Pass Filter Option in Photoshop for Image Processing


At this point run a High Pass filter at about 40 pixels and then Fade High Pass to Soft Light with about 50%. This allows you to really boost contrast, making everything pop that much more.
How to Use the Clarity Adjustment in Camera Raw

Next, you’ll want to do one more round of the Camera Raw filter, which can help remove a little bit of residual noise in the background. Adjust Luminance under the Detail tab.

Under the Basic menu, use the Clarity slider to really bring out the structures. Be careful, because if you push it too far you may lose Saturation. Boosting Clarity to around 30 or so can give you a really nice result.
Using the Hue and Saturation in Photoshop for Image Processing


Lastly, you can adjust Hue and Saturation if you like. While this may not be a completely “finished” image at this point, it’s a testament to the Triad filter’s capabilities that so much structure could be pulled out of an image that was considerably darker at the start.
Triad Filter Image Processing Summary
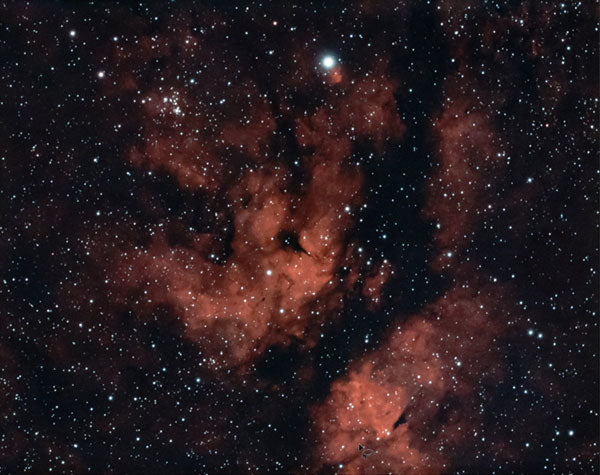
Using the Triad filter allows you to achieve amazing results from highly light-polluted locations. Considering the image here was taken in about magnitude 4 skies with a quarter-moon rising, the results from this basic image processing are all the more impressive. With the Triad filter, you can achieve results like this under equally bright skies.


Hans Feitz
February 07, 2024
Hi guys,
Excellent filter work. I’m a lucky owner of your Triad Ultra Quad NB filter and was hoping for a similar tutorial in PixInsight.
Also where can I find the csv file for the transmission curve for this filter? That would already help me greatly.
Cheers, Hans
Sydney Australia